
This content may include affiliate links, which means if you click on them, I may get a commission. The cool thing is, there’s no extra cost to you!
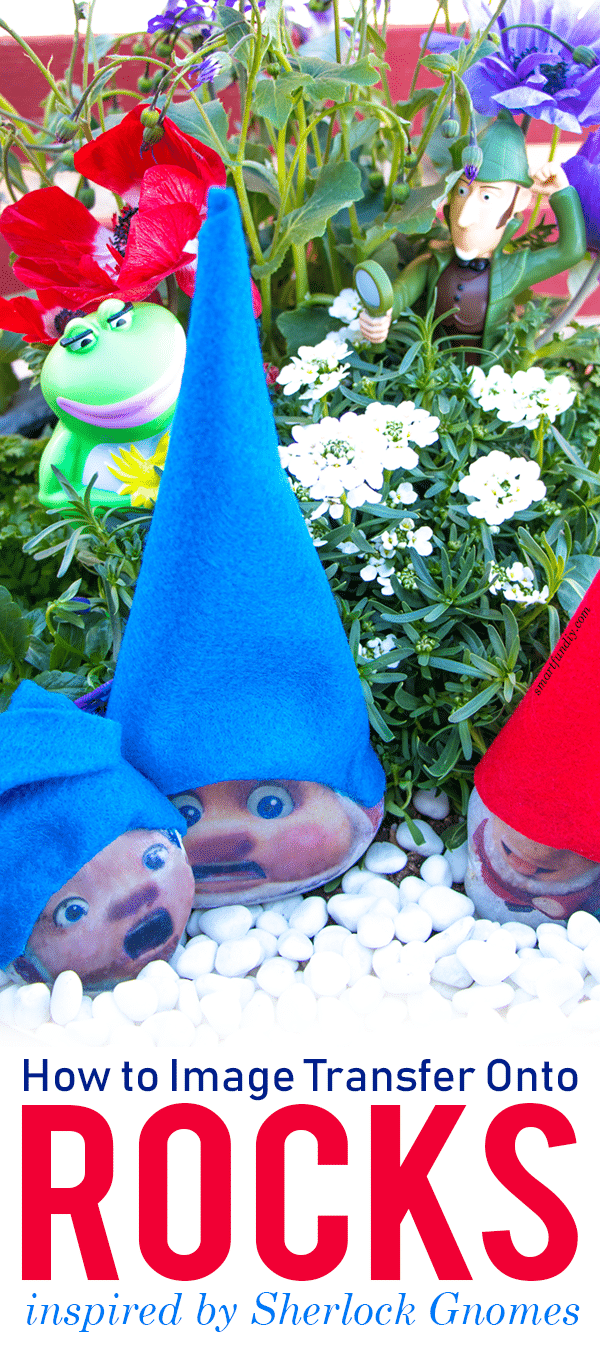
DIY Gnome Rocks – an Easy Way to Image Transfer
This post is sponsored by Paramount Pictures. All opinions are 100% my own.
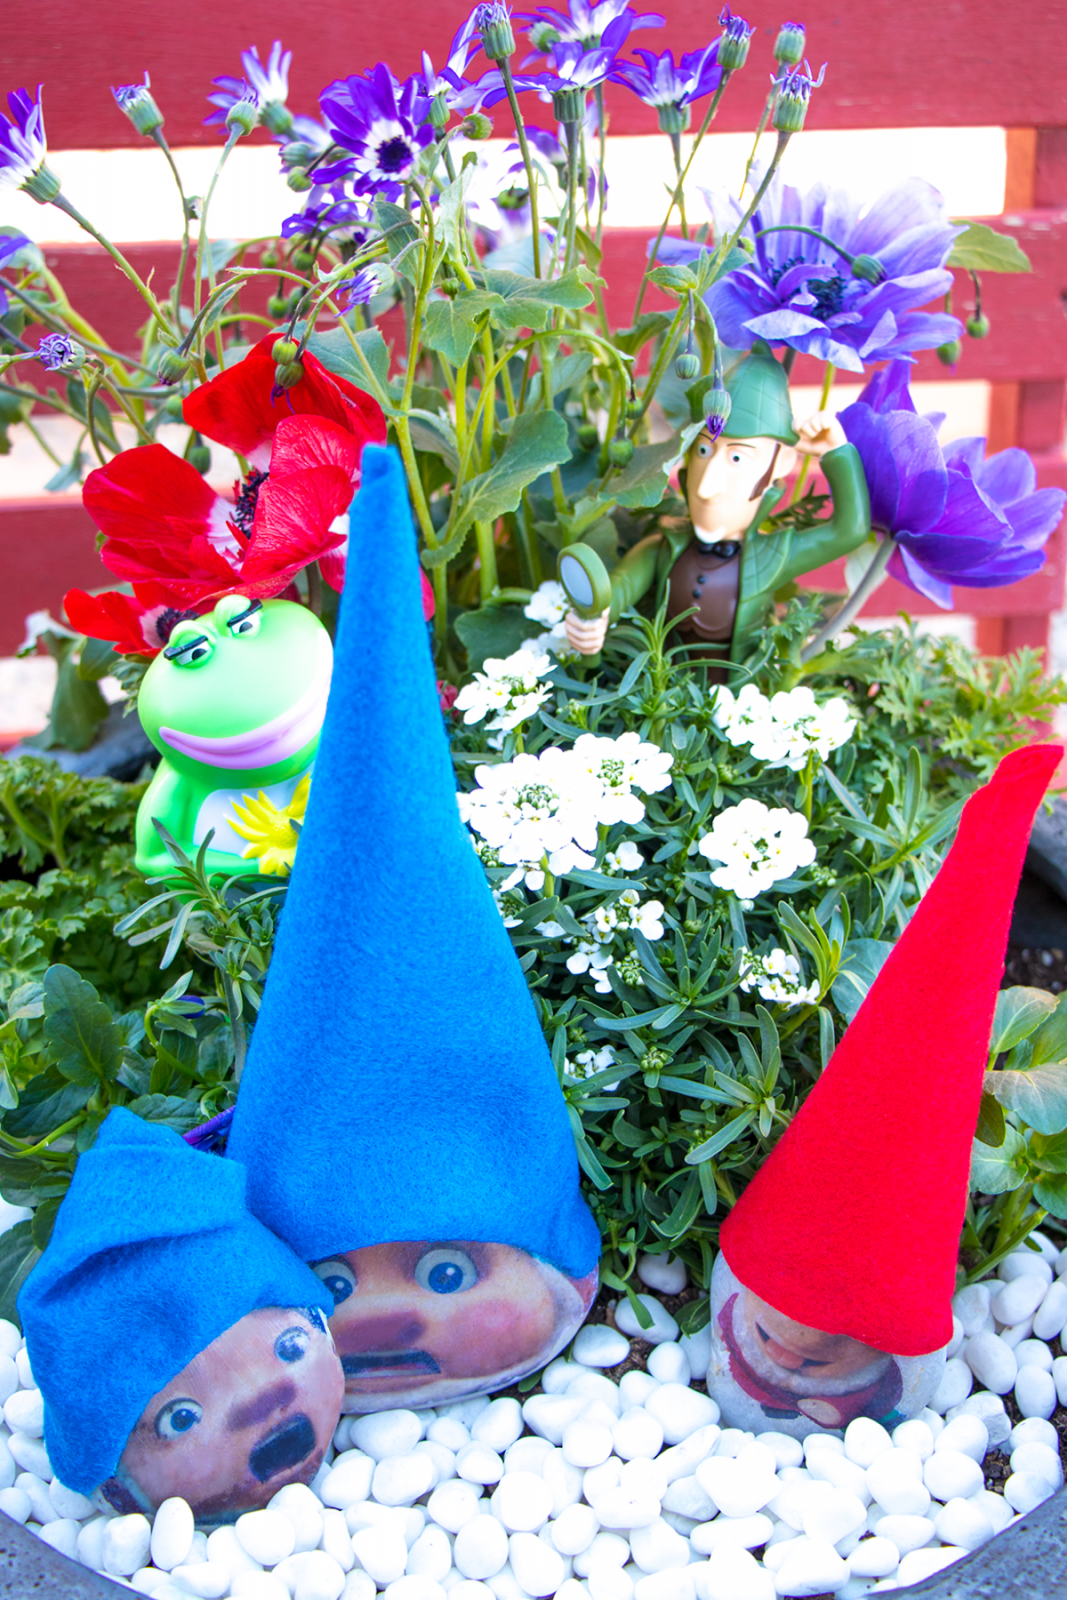
Everywhere I look this spring, I am seeing gnomes and painted rocks. And there's no mystery why! The painted rock trend took off big time last year and it's still going strong. Let's be honest: I don't know if the kids and I have the patience to make painted rocks! And gnomes … that just goes hand in hand with the fairy garden trend. But did you also know that this spring, Gnomeo and Juliet are on a mission to bring every gnome home in SHERLOCK GNOMES, in theaters March 23? That's why we created these easy-to-make faux painted gnome rocks inspired by SHERLOCK GNOMES. So cute, right?
After a string of garden gnome disappearances in London, Gnomeo & Juliet look to legendary detective Sherlock Gnomes to solve the case of their missing friends and family.
The whole family can't wait to check out SHERLOCK GNOMES and solve the mystery of the garden gnome appearances alongside Gnomeo and Juliet.

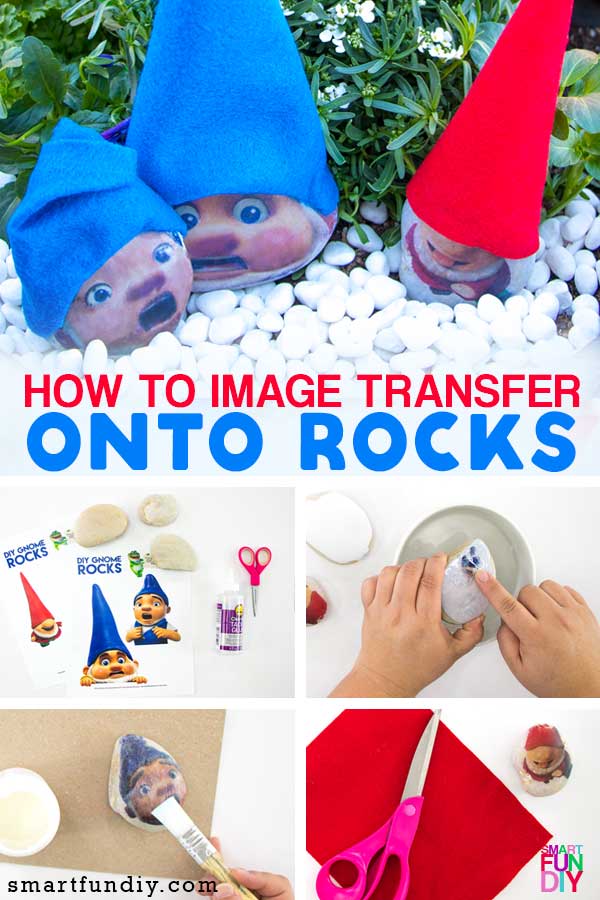
After watching the movie trailer, I created two sheets of printables (download the DIY Gnome Rock printable here) that you can use to make your own rocks.

There are several ways you use these printables. The first way, is the lay carbon paper onto a rock, lay the printable on top, and trace the SHERLOCK GNOMES character onto the rock. Then you can paint the character directly onto the rock with acrylic paints.
The second method for using these printables is to do an image transfer. Print the printables with a laser print and then use gel medium to transfer the image face down onto the rock. Allow to dry and wash away the excess paper. This second way is the method I used to make these gnome rocks.
DIY Gnome Rocks with Image Transfer
These gnome rocks are so cute in the garden or even as paperweights. The image transfers come out imperfect and they might have some variations in color depending on the color and patterning of the rocks you chose. Here's what you'll need to make this project:
Supplies:
- White rocks, 3-4″ diameter, with at least one flat side
- Felt
- Clear Gel Tacky Glue or Gel Medium
- Bowl of water
- Hot glue
- “DIY Gnome Rocks” printable (download here) laser printed or copied
- Clear matte varnish
Tools:
- Scissors
- Hot glue gun
- Paint brush (safe for varnish)
Here's how to create your own garden gnome rocks without painting:
Print the “DIY Gnome Rocks” printable via laser printer. If you don't have a laser printer, have a laser copy made at a copy store. Use scissors to cut out each character from the paper, being careful to stay close to the edge of the character.
Match each character up to the rock you plan to transfer it onto. Trim away any part of the gnome hat that hangs over the top of the rock. Apply a thin coat of gel medium to the printed side of each paper character and to the rock. Press together quickly before the gel dries. Smooth out any bubbles or wrinkles between the paper and the rock. Make sure the paper is pressed tightly against the rock. Allow to dry at least 1 hour.
![]()
Submerge the rocks in a bowl of room temperature water. Carefully and lightly rub the paper with your finger.
![]()
The paper will start peeling away. Continue lightly rubbing to remove all of the paper fibers. Do not press hard when rubbing – this will rub away the image transfer as well. If the image transfer rubs away,you can paint over it or scrub it off all the way and start over.
Allow the rocks to dry at least 30 minutes.
![]()
Paint a thin coat of varnish over the image. This will help seal it as well as remove the haze left from any residual paper fibers Allow to dry.
![]()
Cut a square from a piece of felt. Cut a curved edge along two sides. Roll into a gnome hat shape.
![]()
Carefully wrap the felt halt into the rock, placing it on the gnome's “head”. Secure in place with tacky glue or hot glue and allow to dry.
![]()
Insert the gnome rocks into a planter or display on your desk like a pet rock!
Easy peasy, right?! Make plans to see SHERLOCK GNOMES in theaters March 23. Find out more information of the family friend film by visiting the official sites:
- Visit the Official Site
- Like on Facebook
- Follow on Twitter and Instagram
Pin this project: PIN IT!


About the Author

Jennifer Priest is a 20+ year designer in the arts & crafts industry and home DIYer with a passion for creativity. An Army veteran raised on a ranch, from her experience, she shares smart DIY projects that save money and fun craft ideas that anyone can make. Besides blogging, Jennifer is a Master Practitioner and Trainer of NLP, Hypnosis, and MER, and coaches other online entrepreneurs on money mindset, business, and living an intentional life. When not blogging, Jennifer is having adventures in the wilderness, on road trips, playing with her cats, and making paleo food.


These are so cute! My boys and I have been wanting to see that movie. Thanks so much for sharing this fun craft idea with us at the Summer Time Fun party. Pinned.