This content may include affiliate links, which means if you click on them, I may get a commission. The cool thing is, there’s no extra cost to you!
Transform Your Craft Room with 11 Smart IKEA Raskog Cart Ideas
Inside: Clever and innovative ideas for organizing your craft supplies using the popular IKEA Raskog cart.
You'd be hard-pressed to find a craft room that does not have a utility cart. And most of them likely have the Raskog utility cart from IKEA. I have two original IKEA Raskog carts and don't even have a craft room right now! 🤣
Crafters use Raskogs in two general ways: for storage and as an additional workspace.
In this post, I'll share how crafters use their Raskog cart for crafts, specific craft organizing and storage solutions, and ways to customize your Raskog cart.

Table of Contents
6 Reasons Why Crafters Love Raskog Carts for Crafts
Initially designed for use in the kitchen, IKEA's Raskog utility cart is a favorite among crafters. 😍 And it's easy to see why!
- The cart is on wheels, and it rolls easily
- It's metal, so it's easy to clean
- You can spray paint it any color 🎨
- It fits most bottles of craft supplies
- Hook cups and baskets to the sides for more storage
- Add a lid to the top of each shelf for more workspace
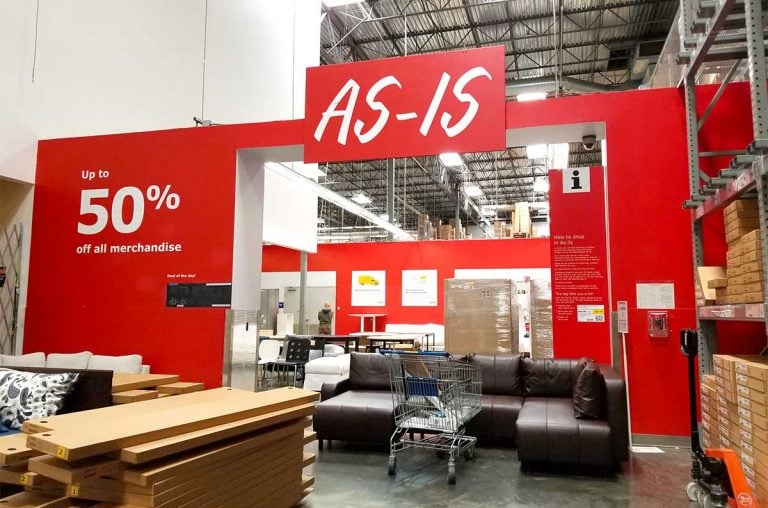
💡Expert Tip: I picked up one of my Raskog carts in the “As-Is” section of the store for only $18! This is why you must make IKEA's “As-Is” Section your first stop on every IKEA trip.
How to Get More Storage From IKEA Raskog Carts
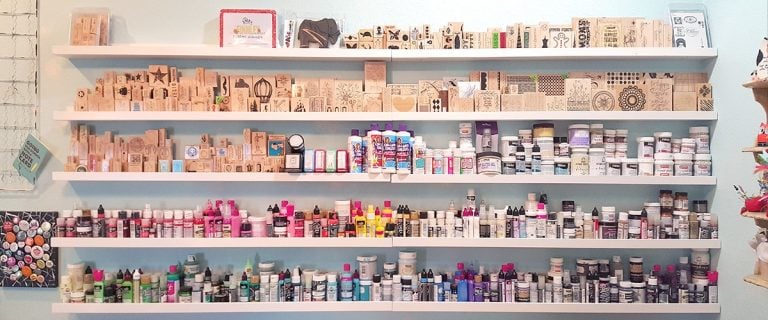
Adding cups to the top of the Raskog cart in my craft room allows for vertical storage of paint brushes 🖌️, scissors, and other tall items, making them easy to access from beside my craft table without taking up space on my tabletop.

💡 Some crafters add wood lids to the top tier of their IKEA Raskog cart to use it as a table.
Use metal baskets and S hooks on the sides to create even more storage.
Copycat Raskog Carts
The IKEA Raskog is the original utility cart. But other companies have created knockoffs of the popular cart, like these:
- Target utility cart (and they have a round one too!)
- Michael's Lexington Cart (made by Darice)
- Michael's Gramercy Cart (with pegboard side)
- We R Memory Keepers Cart
- Costco Oceanstar 3-Tier Bamboo and Metal Cart

How to Organize Your Raskog Cart
You'll need these accessories to help organize the contents of the cart and create even more storage space:
- ✅ Hooks: use these to hang Cricut mats, plexi grid rulers, and more from the side of your Raskog
- ✅ S hooks: IKEA actually sells these under the SUNNERSTA line, but you can also use S hooks like these from the hardware store
- ✅ Cups: SUNNERSTA containers are plastic cups with a lip that hooks over the side of the Raskog cart
- ✅ Shelves: SUNNERSTA shelves can be hooked to the side of the Raskog for additional storage, like a tray.
- ✅ Baskets: IKEA's OMAR clip-on basket hooks onto the long sides of the Raskog cart to create storage off the side
- ✅ Dividers
- Metal cans: SOCKER plant pots are great for holding paint brushes and scissors in the top tier of the Raskog
- Jars: Ball jars or IKEA 365+ jars can be used to hold small items
- Trays: IKEA has lots of divided trays you can use in the top of the Raskog. Just be sure to measure before buying
- ✅ Magnetic canisters with lids: magnetic spice canisters are great for organizing small supplies and can be attached to the side of the Raskog cart

11 Ways to Use a Raskog Cart in Your Craft Room
Check out these smart ideas for using a Raskog cart in your craft room✂️:
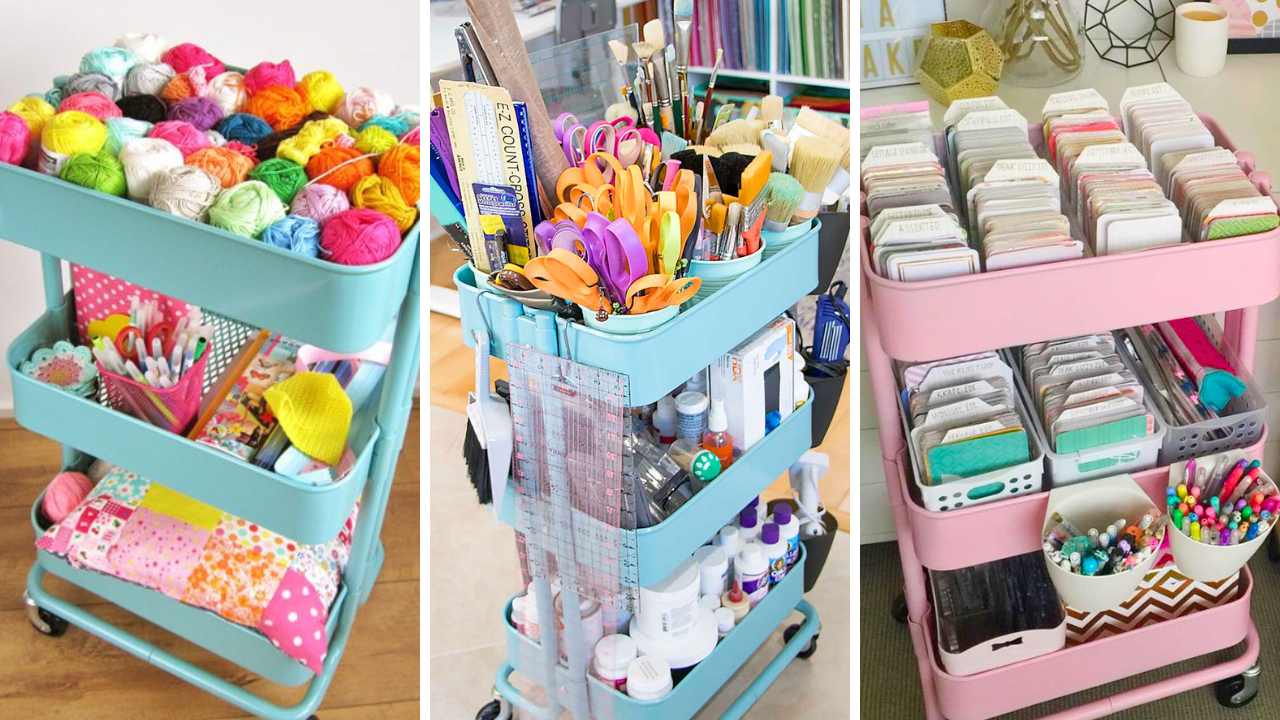
1. Raskog for Yarn:

Sarah from Repeat Crafter Me set up an entire crochet cart using her Raskog – her tips are genius💡, especially the one about storing “works in progress” or projects she is currently working on.
2. Paintbrushes and Awkward Long Items: Store Tall Tools in the Top of Your Raskog
Fill the top level of the cart with cups to hold long, awkward-shaped items vertically. 🖌️ You can use:
- Plastic Cups
- Metal Cups
- Plant Pots or Ceramic Pots
- Coffee Mugs – I particularly like the idea of using mugs from the thrift shop or a mug collection.
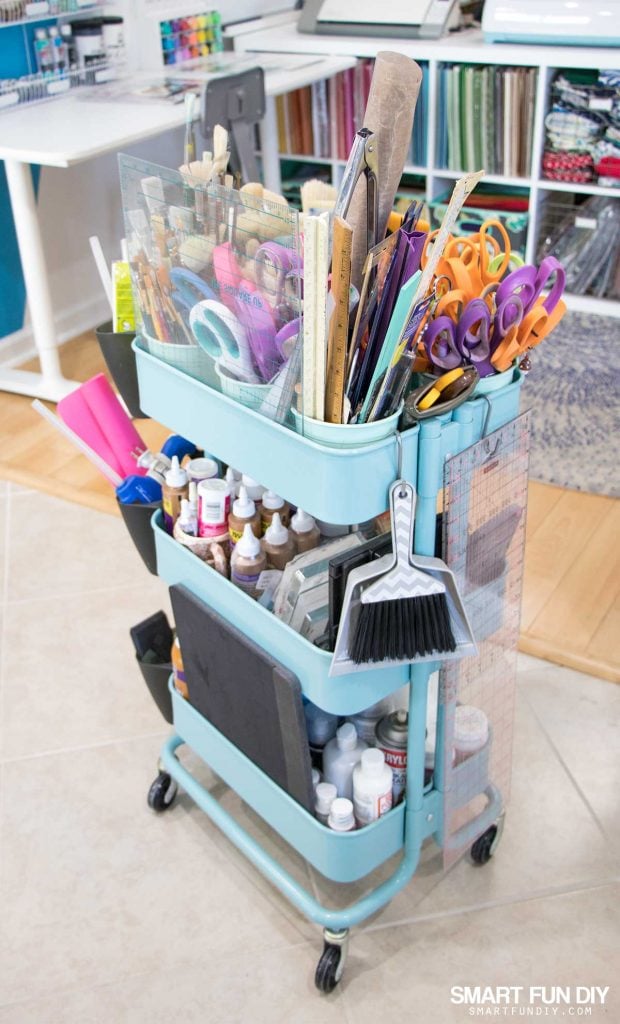
For my Raskog cart, I used mint green colored metal plant pots from IKEA to fill the top level of my Raskog. I filled the cups with tools that I wanted easily accessible:
- ✂️ Scissors
- Fabric rotary cutters
- 🖌️ Paint brushes
- Rolled-up craft mats and glue gun mats (if you don't have one of these mats, it's a MUST! Paint, glue, and everything messy peels right off)
- 📏 Rulers, straight edges, and paper-tearing rulers
- 🗡️Craft knives
Roll the cart up next to me, and I have every tool I could want at the ready, right under my fingertips, without taking up space on the tabletop.
3. Flip the Top of the Raskog Cart to Create a Quilting Workstation
Chatterbox Quilts flipped the top tier of her Raskog cart upside-down to create a work surface for sewing. Woah! 🤩

In her video, she shares three ways to use the top of the flipped Raskog for sewing:
- Ironing Station with a small ironing board
- Sewing Machine Station
- Fabric cutting station
I bet you could imagine more ways to use this mobile work surface in your craft space, couldn't you? 😉
4. Create Mixed Media Rolling Carts with Multiple IKEA Raskog Trolleys
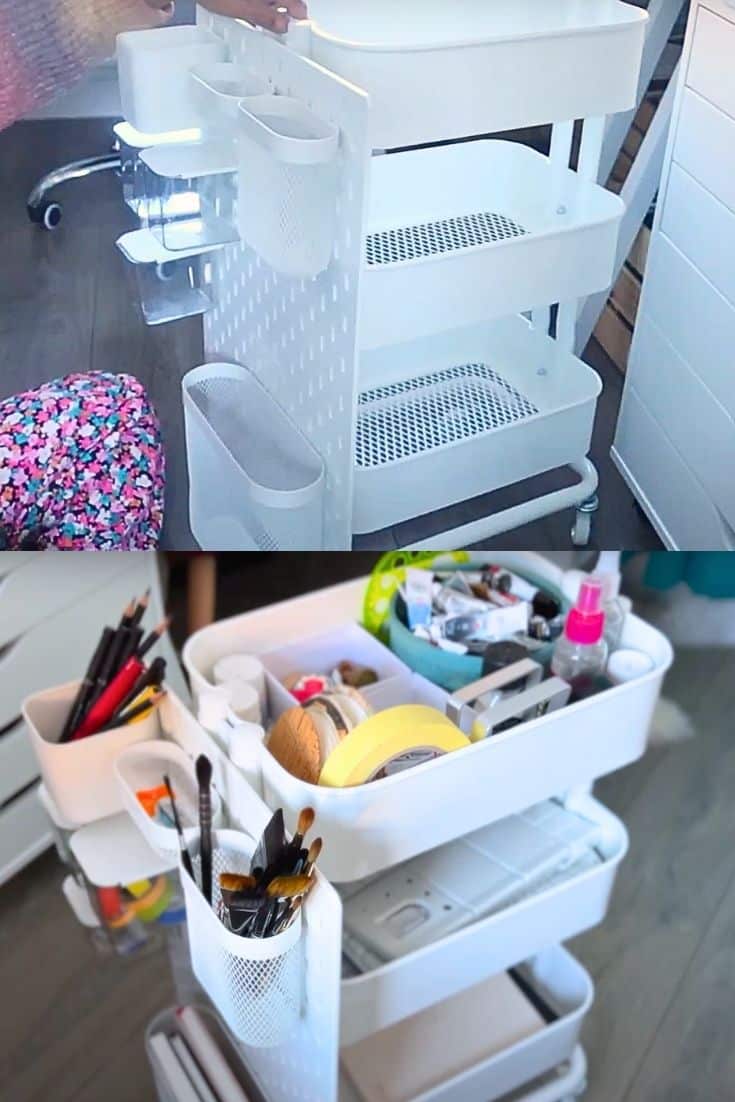
Marlene Plasencia shares an in-depth tour of her two Raskog carts full of mixed media art supplies.
💡One of her smart tips is to use pencil pouches like these to gather small art supplies like pastels or markers and erasers so you can grab and go while working.
5. Raskog Rolling Die Cutting Station and Metal Die Storage
Karen Yagel of Yes Please Papercrafts shared her two Raskog carts in this video tour of her craft room.

What I love 💖 is how she used plastic dividers in the Raskog tiers to store her metal cutting dies vertically, allowing her to flip through the dies to find the design she wants to use.
6. Use Fridge Bins to Organize Multiple Supplies in Your Raskog
Rebecca Keppel shared how she uses clear refrigerator organizing bins to corral similar items in her Raskog carts. These stacking clear bins could give you even more vertical storage on the top of the cart.

Remove the bins when working on a project and replace them when done. 💡I also like how she keeps complementary supplies together in the same bin, like glitter gel and the sealant for the glitter.
7. Add a Paper Towel Holder to Your Raskog
I love this idea from Liz Moore on Youtube! 😍
She recommends getting an adjustable over-the-cabinet towel bar like this and hooking it to the side of your Raskog cart to hold a roll of paper towels. Genius!

8. Raskog for Scrapbooking:
Project Life is a modular scrapbooking system that uses cards and similar-sized pieces of paper to scrapbook quickly.
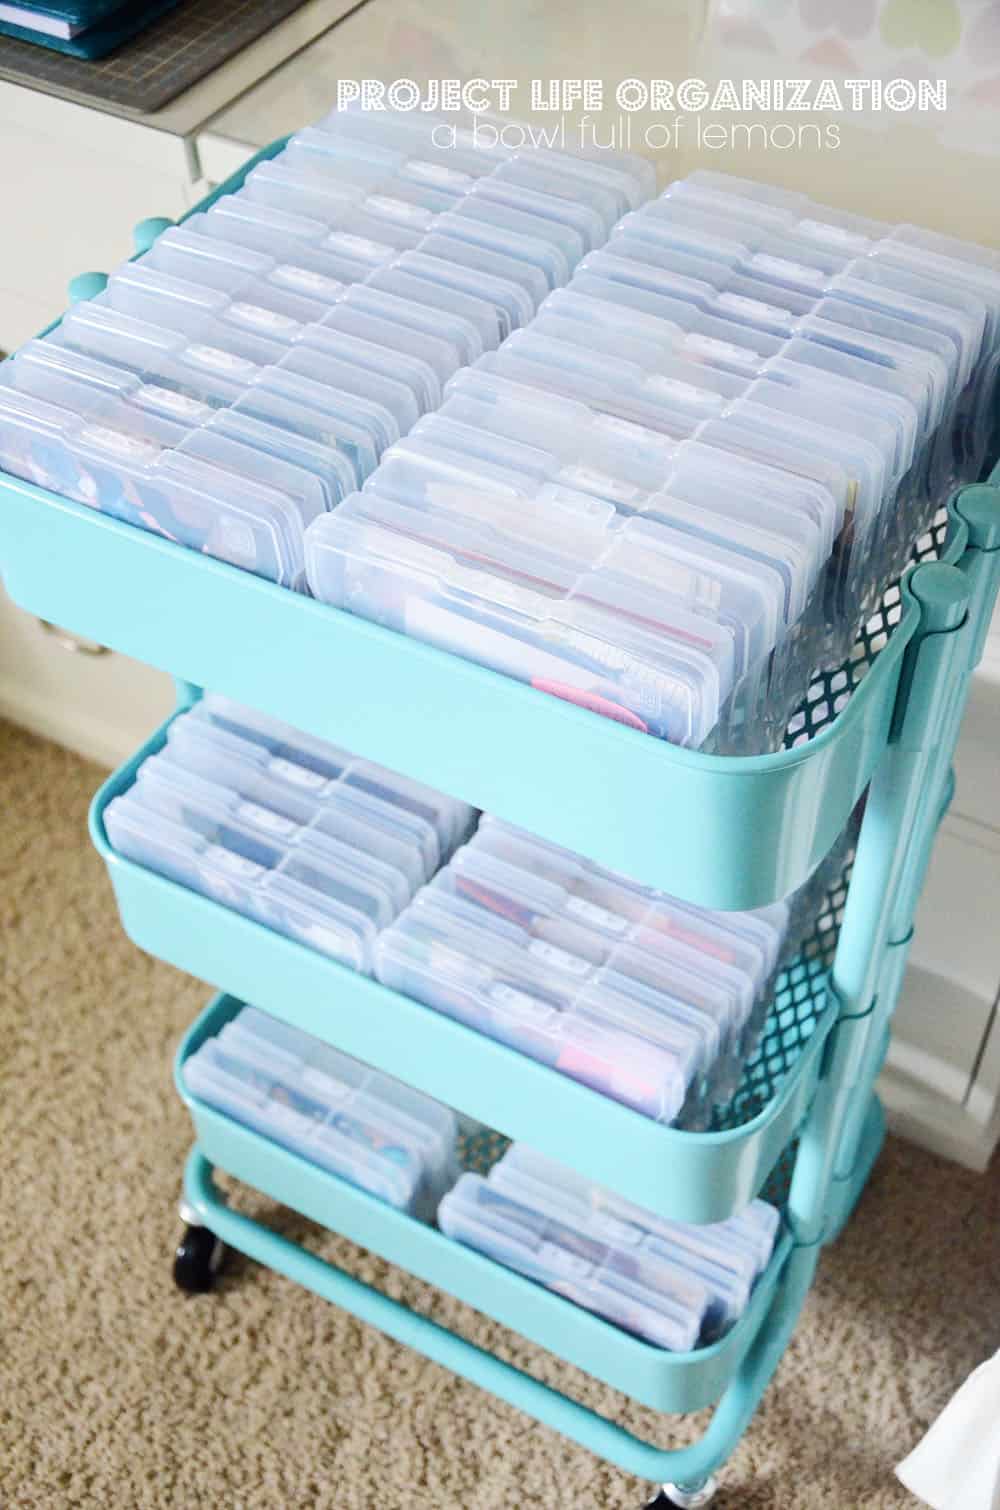
A Bowl Full of Lemons organized her Project Life supplies into Iris photo boxes and stored them vertically in her Raskog cart.
You can also organize your Project Life cards and scrapbooking supplies in the Raskog without plastic containers. 😲 Laura Vorlicek shares how in this Instagram post:

9. IKEA Mashup 🤯Raskog Cart with IKEA Skadis Pegboard Side!
Colorfulmystique added pegboard to her Raskog cart! 💡Talk about a smart IKEA hack, right?
In this video, she shares how she combined IKEA Skadis pegboard and her IKEA Raskog cart to make a super functional craft storage cart.
10. Raskog for Cricut
Store your ✂️ Cricut tools and supplies in a handy Raskog cart like DIBY Club did!

11. Raskog for Sewing
DIY Inspired uses her Raskog to store fabric and fabric scraps. 🧵Her sewing machine sits right on top!
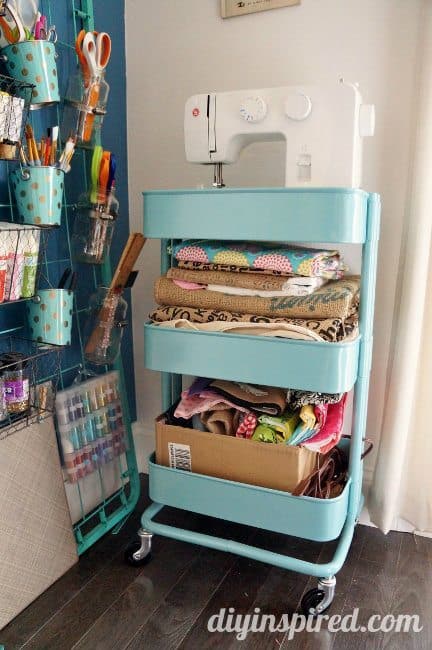
💡Get a wood top for the cart from Michael's and set your sewing machine on top if the sewing machine doesn't fit inside the top bin on the cart.
More Ways to Use IKEA Raskog!
😎 As a bonus, check out this playlist I created with the BEST Raskog Cart Ideas for Crafts YouTube:
Check out these 30+ Ways to Use a Raskog Cart for makeup, cleaning supplies, and even plants beyond the craft room.
If you liked this post, would you share it on Facebook or Pinterest? Thank you!

About the Author

Jennifer Priest is a 20+ year designer in the arts & crafts industry and home DIYer with a passion for creativity. An Army veteran raised on a ranch, from her experience, she shares smart DIY projects that save money and fun craft ideas that anyone can make. Besides blogging, Jennifer is a Master Practitioner and Trainer of NLP, Hypnosis, and MER, and coaches other online entrepreneurs on money mindset, business, and living an intentional life. When not blogging, Jennifer is having adventures in the wilderness, on road trips, playing with her cats, and making paleo food.