This content may include affiliate links, which means if you click on them, I may get a commission. The cool thing is, there’s no extra cost to you!
DIY Planner Charm from a gift card
Everybody is selling planner charms and accessories from fur puffs to tassels and beaded dangles. What they don't want you to know is that stuff is SUPER EASY to make yourself! Better yet, when you DIY your planner charm, it's as unique as you are. I made my own planner charm using basic jewelry supplies and resin. Now, resin can seem advanced but it isn't – it's pretty darned easy. You don't have to mess with resin if you don't want to – just use a pre-made charm from the jewelry section of the craft shop instead. Or even a favorite piece of old or broken jewelry! Use the jewelry pliers to take it apart and re-make it into a planner charm. Or, there's always this DIY planner charm, from a gift card!
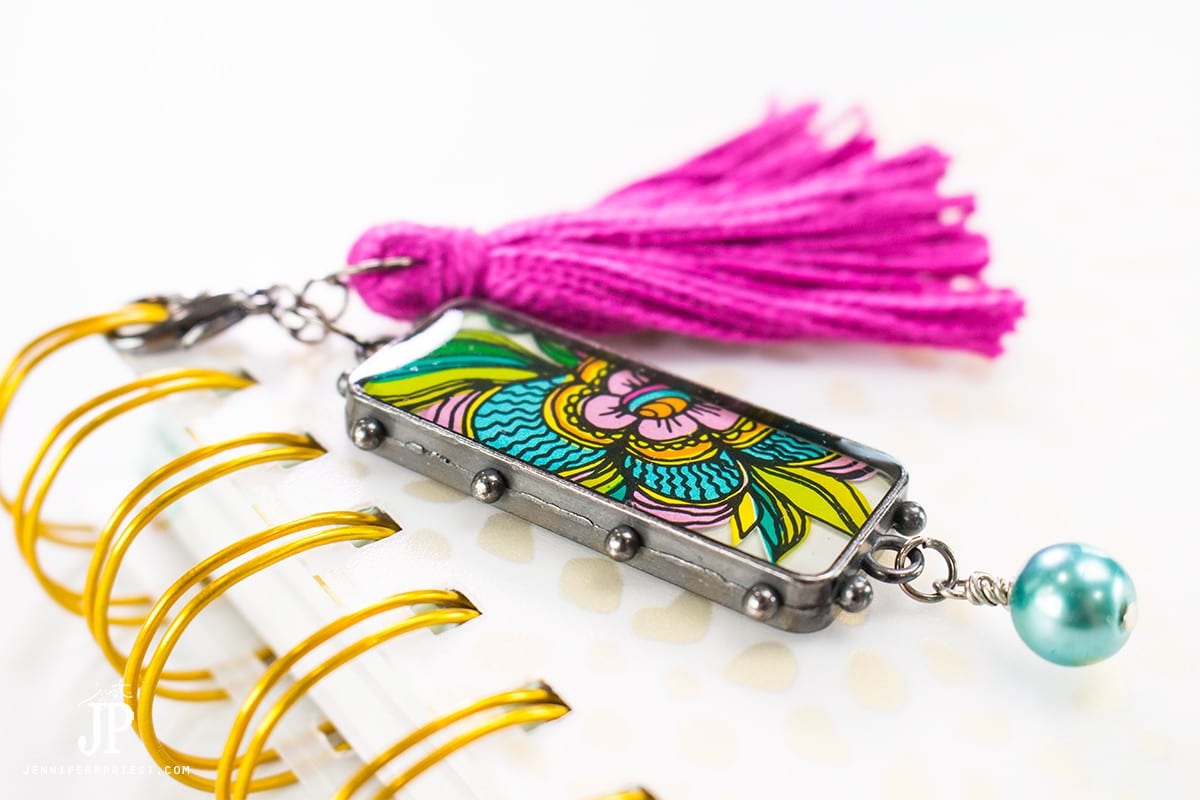
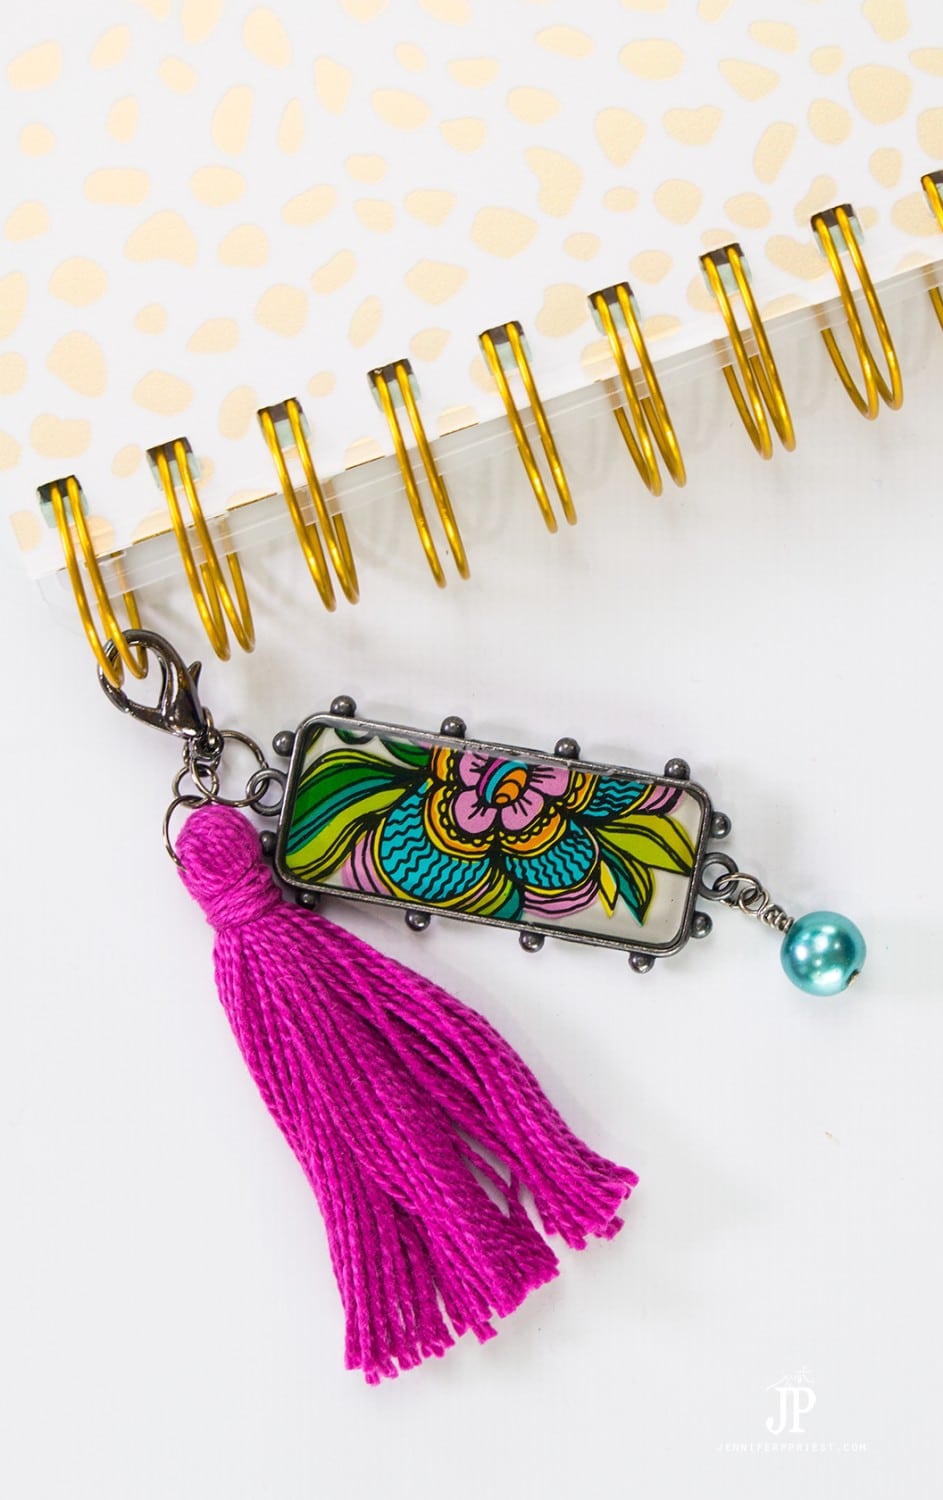
So many shops have gift cards with gorgeous designs on them these days. I have had this really pretty Starbuck's gift card in my desk drawer for years. It kind of seemed like a waste, sitting in a dark drawer where no one could see it. You can make any gift card into a gift card charm that you can then turn into a necklace, keychain, or planner charm. I'm actually sharing how to turn this gift card pendant into a DIY planner charm with a tassel in today's post. Keep reading to see how!
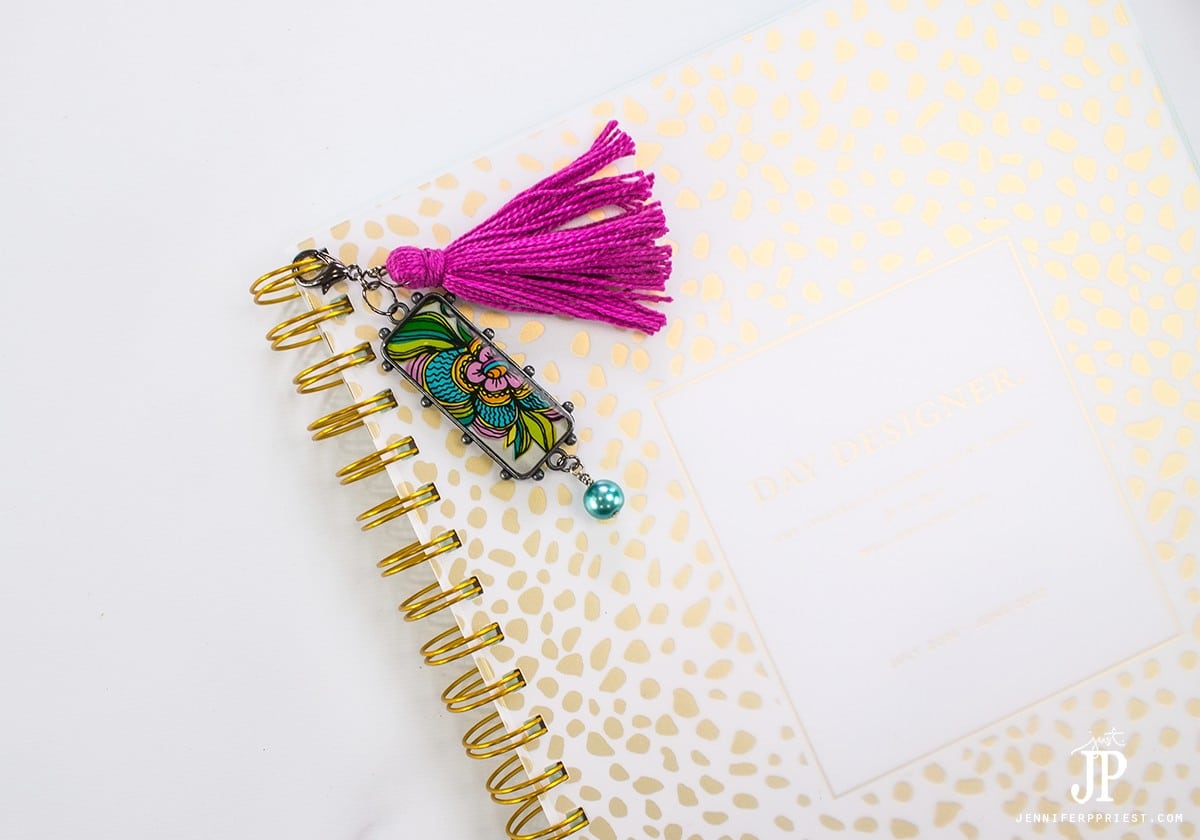
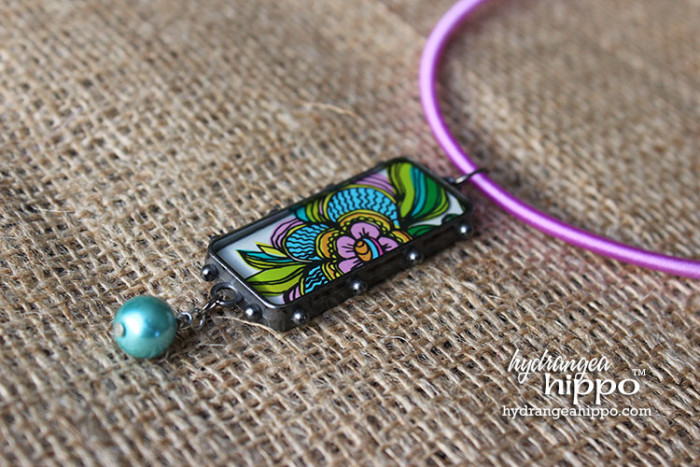
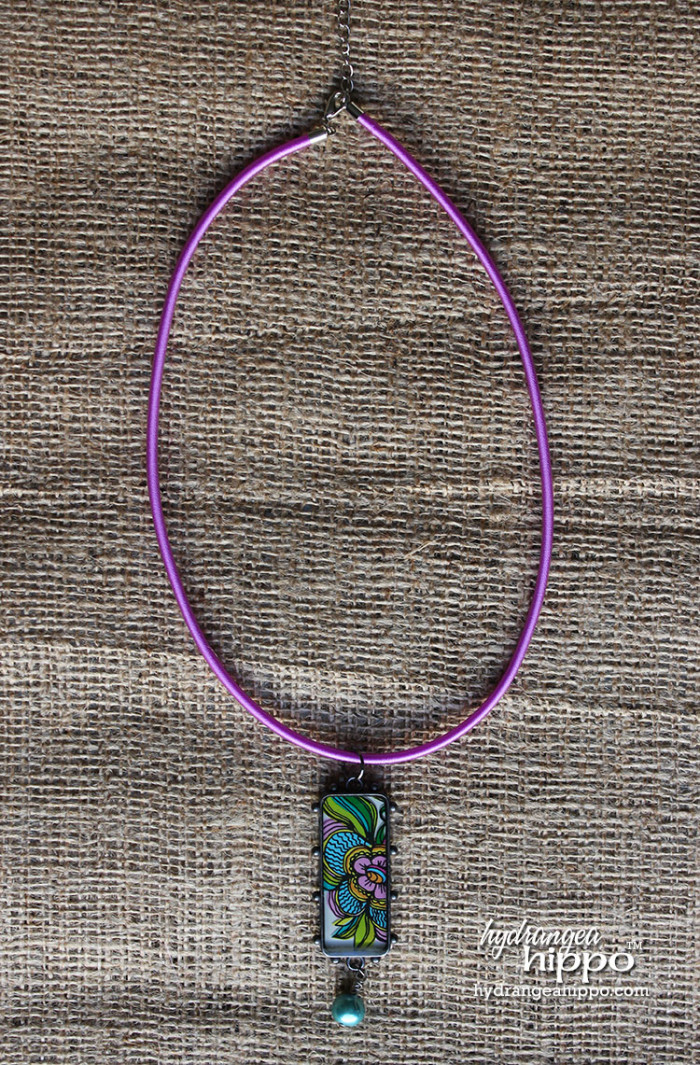
I used this charm on a necklace for a while and then I recently turned it into a charm for my new Day Designer planner. Like I said above, just because a favorite piece of jewelry isn't working as jewelry anymore, doesn't mean it needs to go bye bye. You can upcycle it into something new!
RELATED POST: Upcycled jewelry box
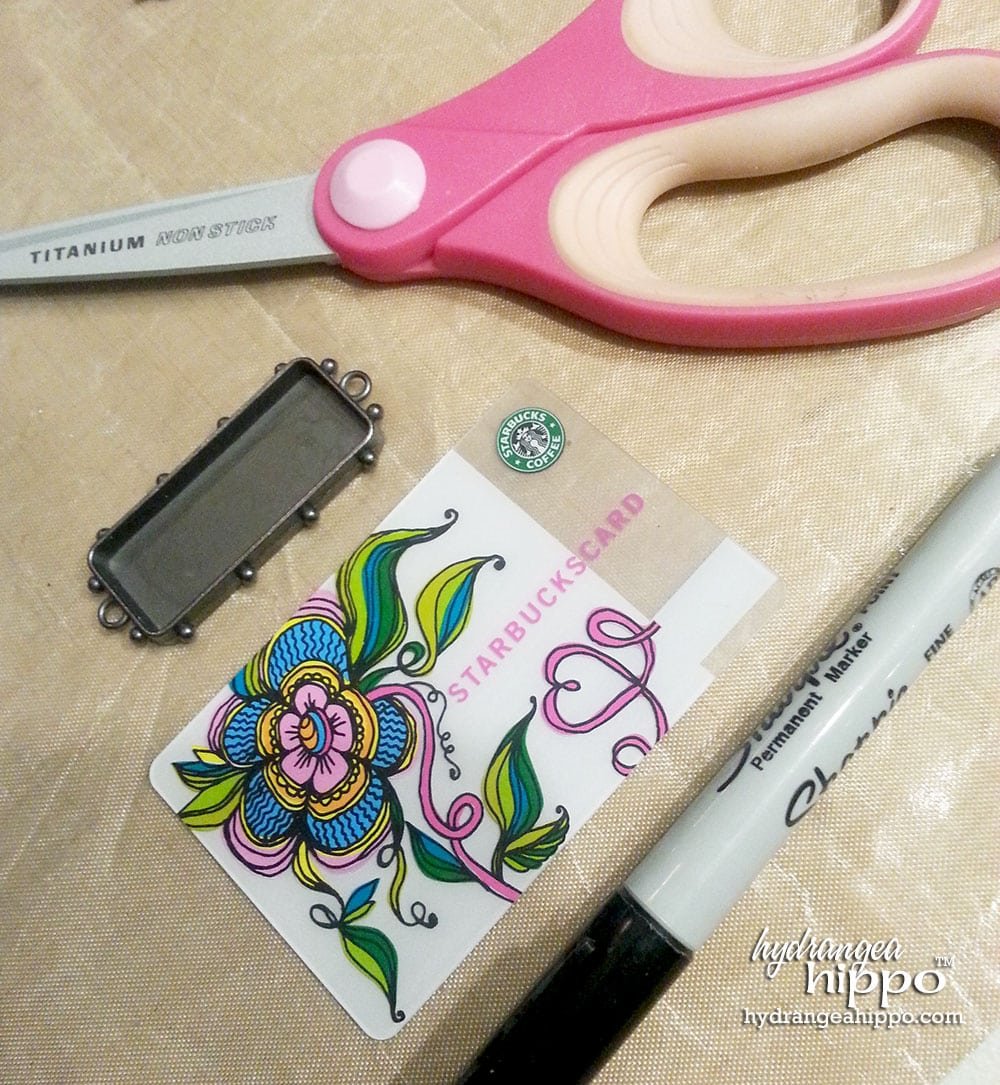
To make this project, you'll need jewelry resin, a bezel (the “tray” piece the gift card will sit in), and a gift card. Depending on the shape of the bezel used, you can get two to three pendants from one gift card.
You don't have to use a gift card for this project; you can make a resin pendant with any items that might seem like trash – a pretty label from a wine bottle, a piece of plastic from a product package, or even a pretty image printed from the internet, or old postage stamps. When using resin, paper pieces need to be sealed because the resin will make them translucent. That's why I like using gift cards – that plastic won't soak up the resin and it actually makes the gift card look even prettier!
RELATED PROJECT: Bird Feeder from dollar store plastic cups
Supply List:
- Gift Card
- ICE Resin Art Mechanique Bezel
- ICE Resin Kit with stir sticks and cups
- Plastic Gloves
- Permanent Marker
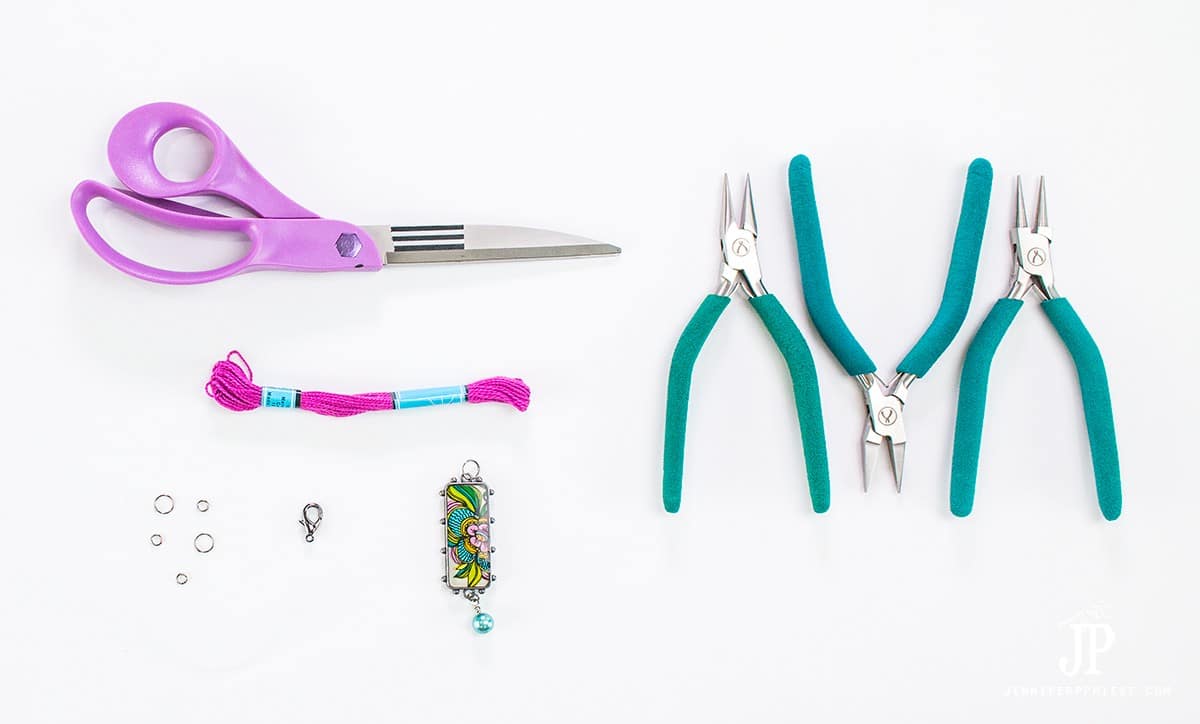
- Jump Rings
- Pearl Bead
- Head Pin
Tools:
To make a necklace, you'll also need:
- Cord Necklace
To make a planner charm, you'll need these additional supplies:
- Lobster Clasp
- Craft Floss
How to make a resin planner charm with a gift card
I used resin on this project but if you don't want to use resin, you can glue the gift card piece into the bezel with a strong glue like Aleene's The Ultimate. Or get a pre-made charm from the jewelry section of the store. Any of these charms from Cousin DIY would be perfect!
Watch this video to see how to make a resin pendant and planner charm from a gift card:
RELATED POST: From old encyclopedia to CHIC holiday wreath!
I just love how this DIY planner charm turned out. Now I can enjoy this pretty Starbucks gift card every day, whenever I open my planner. I'd love for you to have the same experience with your own custom planner charm!

RELATED PROJECT: Mini Photo Albums from Gift Cards
Do you have any favorite gift cards laying around, just waiting to be made into something great? Let me know what gift cards you have and if you have ever made a DIY planner charm!

About the Author

Jennifer Priest is a 20+ year designer in the arts & crafts industry and home DIYer with a passion for creativity. An Army veteran raised on a ranch, from her experience, she shares smart DIY projects that save money and fun craft ideas that anyone can make. Besides blogging, Jennifer is a Master Practitioner and Trainer of NLP, Hypnosis, and MER, and coaches other online entrepreneurs on money mindset, business, and living an intentional life. When not blogging, Jennifer is having adventures in the wilderness, on road trips, playing with her cats, and making paleo food.