

This content may include affiliate links, which means if you click on them, I may get a commission. The cool thing is, there’s no extra cost to you!
How to Make a Gravel Patio
Are you here to make a gravel patio? You're in the right place!! A gravel patio is an affordable way to finish your yard and make a pad for entertaining. Our backyard has been a tough place to rehab since we got this house eight years ago.
We've been trying to find a solution to our side yard, an area where we wanted to put our firepit, planters, and flower pots so we can relax while barbecuing. The backyard has been an eyesore and we want to have a space we can enjoy and be proud of. Let's get started:
This post contains affiliate links. When you click and make a purchase from these links, we might get a commission. And bonus, it doesn't cost you anything extra!

Why choose a gravel patio?
There are lots of choices for patios and decks, from wood to concrete and even bark. We chose gravel for several reasons:
Pea gravel is relatively cheap ground cover
To cover a large area, you can't beat the price per square foot of pea gravel. It's recommended that you make the pea gravel 2″ thick. A ton of gravel will cover about 100 square feet, 2″ deep. Typically gravel is sold by the ton or scoop, and a scoop is usually equivalent to a ton.
We used pea gravel in our raised bed garden for drainage in the pathways because it was much cheaper than using bark or mulch.
You can get pea gravel in bulk and delivered to your home
Local rock yards will deliver pea gravel to your home and you can order it by the scoop for about $40-80 per scoop.
Why not bark? Bark comes in bags that you have to buy individually at a home improvement stores so you're paying for all of that packaging, even though you don't need it. I have yet to find bark in bulk to buy for the public.
Concrete patios. You can mix concrete yourself but you need a mixer or need to order a concrete truck, both of which are an additional cost and another step for creating the patio. And you'll also need to build a from for the concrete pad, which is more work and requires additional supplies and tools like 2x4s and a saw.
Gravel is simply the easiest choice!
Pea gravel allows for drainage
There have been drainage problems and other things we discovered in our backyard and we've been trying to find solutions to the problems so our backyard can finally be livable. We've done a lot of projects to make our back yard look beautiful but this side yard has long been a problem for us.

One year we had a mud pit, literally, in the backyard! The kids loved it but me, not so much.
Okay, truth be told this photo is from my front yard but you get the idea … (p.s. we used the same under layment for the rock garden in the front yard as we did for this gravel patio!)

We tried gravel with black plastic, which kept some of the weeds out but mostly caused a stinky runoff problem because of the lack of drainage in our yard.
So what do you use to allow drainage with pea gravel?
When someone told me that I could use the same felt that I make crafts with as a barrier for a rock patio, it got the wheels turning in my head. I was sent several bolts of felt by my favorite felt company, Kunin Group, and we set to working.
Eight weeks later, this landscaping fabric alternative really does work and the patio looks great!
Can I use gravel next to a fence?
Yes, you can use pea gravel with drainage up against a wood fence, like we did here.
You can make a gravel patio yourself!
You can DIY this gravel patio in a weekend or even in a day if you are super fit and the area s already relatively flat. We are not super fit so it took us a couple days to complete this process. You'll save on labor costs over hiring contractors or professionals and get a work out in the process!
Here's a before photo of our sideyard:
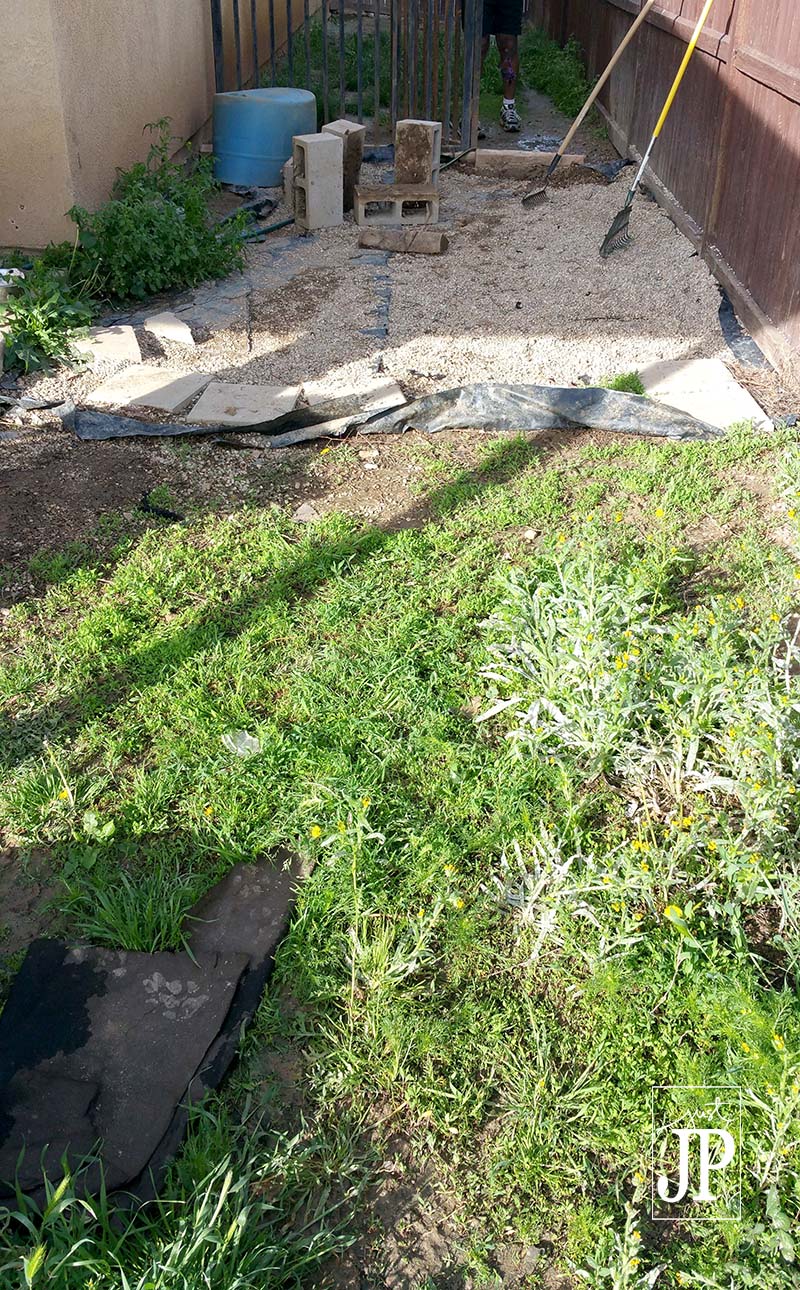
Do you have a weed filled mud pit like this in your yard? We are gonna fix that!!
How can I make my yard look nice cheap?
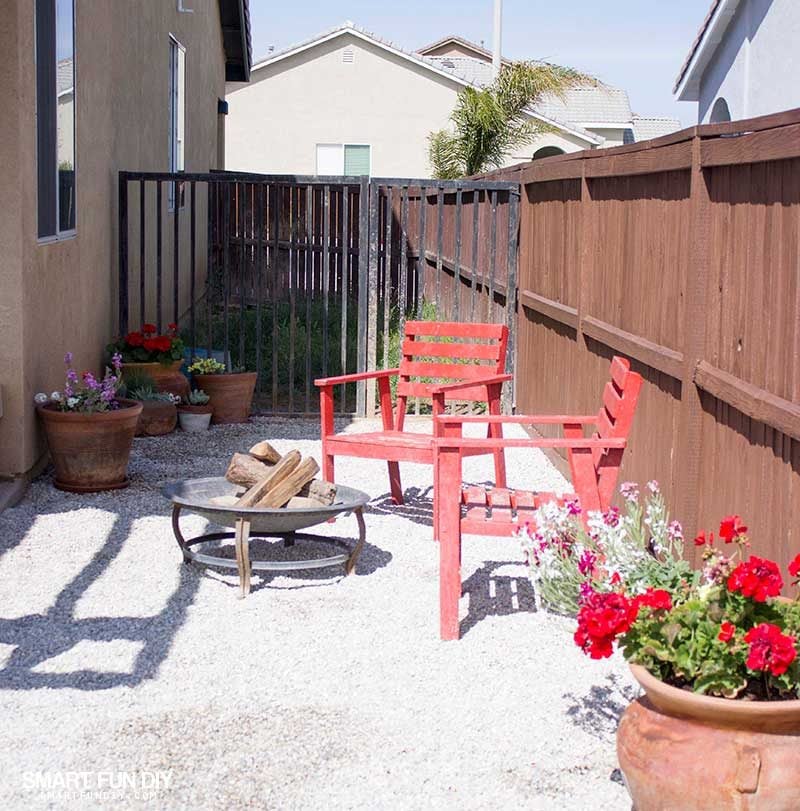


We took the yard from super drab to totally fab in one weekend! Isn't this awesome?! I have since added some pavers in the gravel to give it a different look and to discourage my outside cats from using it as a giant litter box.
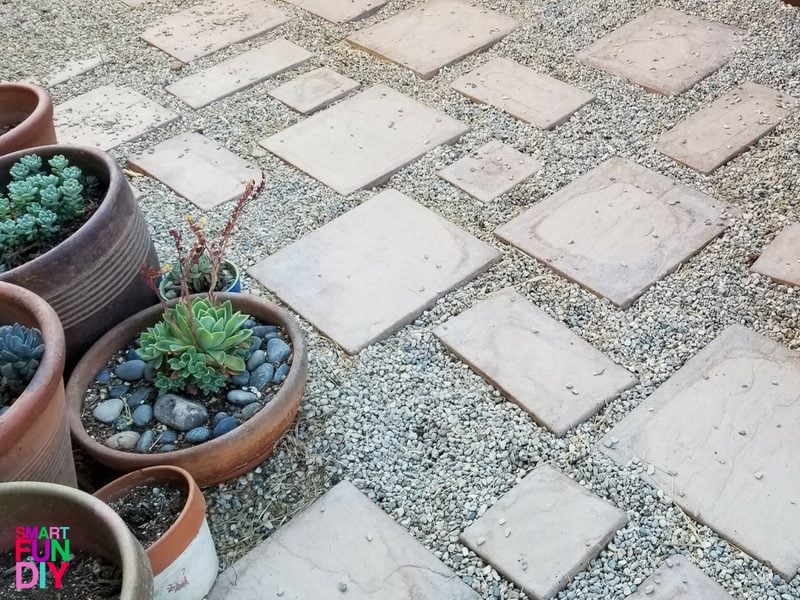
Yes, that happened … so if you have outside cats, consider adding some concrete pavers to the gravel to discourage them from digging.
You can also see some grass cuttings in the gravel. Make sure you collect grass cuttings or use a leaf blower to remove these from the gravel as they can collect dirt and create places for weds to grow. Plus it just looks dirty. I am planning on getting a leaf blower really soon!
Want to learn how to make a gravel patio in your outdoor space?
- Once you know where you want to place the gravel patio, make sure the ground is level and free of any large stones.
- Roll the felt out and cut to fit the space. Make sure seams are overlapped by at least 12″ to prevent weeds from peeking through the gap between the fabric.
- Tack down the felt with stakes, found in the garden section of most home improvement shops.
- Edge the patio area with bricks to keep the gravel from spilling into grass or other adjacent areas.
- Start filling the area with gravel by starting in the middle and spreading the gravel with a rake. Make sure the gravel is at least 2″ deep in all areas.
This side yard patio area took 2 “scoops” of gravel from a backhoe. Add a bench, water feature like a fountain, string lights, or fire pits to create and outdoor living space.
What's the cheapest way to landscape a backyard?
Definitely pea gravel.
Here's what you'll need to make your own pea gravel patio:
Supplies for making a gravel patio, 12 feet x 20 feet:
- 2 “scoops” of gravel, $55 each – use this site to calculate how much gravel you need for your patio
- 1 bolt (10 yards) of Kunin Eco-Fi Premium Plus Felt – this color is best! (you may need more for a larger area)
- 1 box of landscape staples, $10 – again, you may need more for a larger area
Tools:
- Hammer
- Square End Shovel
- Rake
- Wheelbarrow (to move gravel from the front yard to the backyard)
- Scissors
Here's a video of how to make a gravel patio, from start to finish:
Click here to watch this video on YouTube.
Decorate your gravel patio
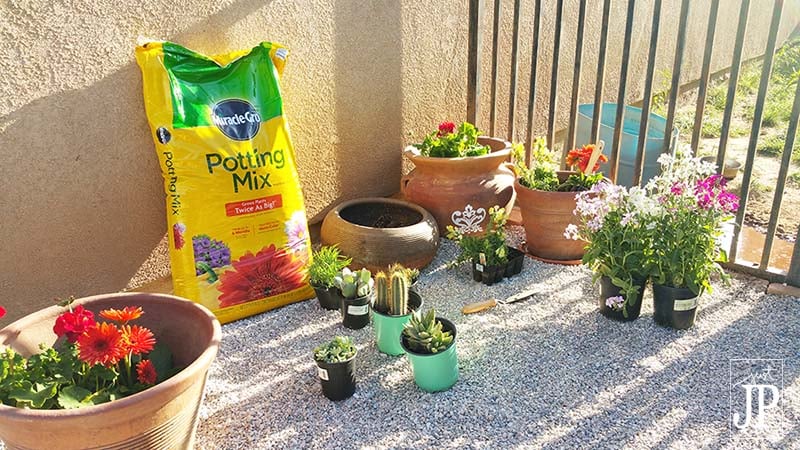
Once the felt and gravel were in place, it was time to add some color to this gravel patio! I chose bright, colorful perennials and annuals to plant in terra cotta pots I already had: geraniums, gerbera daisies, snapdragons, and more.
I also created a few pots of succulents to take advantage of the partial shade on that side of the house and to add some greenery. Potted plants are a great way to soften hardscaping.
Check out this post I did for Miracle Gro, showing how I used the potted plants to add color. To dress up the pots, I stenciled them with acrylic craft paint and vinyl stencils I made using an electronic cutter – watch the tutorial here.
Gravel Patio Maintenance
The eco-fi felt we laid down allows the water to drain through to the dirt below but its tightly woven fibers keep weeds from growing in the gravel area, which is why I have not had to weed this area at all since installation.
Drainage with the gravel patio underlayment or landscape fabric
Since the felt is made from recycled plastic bottles, it naturally resists mold and mildew, making this a great place for us to relax and enjoy the coming summer months without a worry of bacteria lurking below (like we had with the black plastic landscaping material that we replaced).
I put saucers under the pots with drainage holes to prevent any soil from leaking out into the gravel.
I'm really looking forward to making s'mores (OMG, this recipe is amaze!) over our firepit in this pretty little patio area while we sit outside and cook dinner on the grill.
Gravel Patio UPDATE July 2018
Now, two years later, I do have to weed this area about once a quarter because seeds from grass and other weeds have blown in and lodge between the gravel pebbles. Weeding is super easy – the weeds just pull right out of the gravel. We have made lots of s'mores and entertained in this area … my family absolutely loves it! This is one of my favorite budget-friendly backyard makeovers for a small backyard.
Are you making a DIY patio with gravel? I want to see your results!! Share your pics over at http://facebook.com/smartfundiy
Got questions? Please post them in the comments!
Save this post for later on Pinterest:


About the Author

Jennifer Priest is a 20+ year designer in the arts & crafts industry and home DIYer with a passion for creativity. An Army veteran raised on a ranch, from her experience, she shares smart DIY projects that save money and fun craft ideas that anyone can make. Besides blogging, Jennifer is a Master Practitioner and Trainer of NLP, Hypnosis, and MER, and coaches other online entrepreneurs on money mindset, business, and living an intentional life. When not blogging, Jennifer is having adventures in the wilderness, on road trips, playing with her cats, and making paleo food.


This is wonderful! I am especially interested in the eco felt for the underlayment of the pea gravel! I was disappointed to see that the price for a bolt is now almost $100! Maybe your post really got the word out 🙂 and Walmart jacked up the price? Any ideas where I could get it cheaper?
http://www.walmart.com/ip/Kunin-Eco-fi-Plus-Premium-Felt.-72-W.-10yd-Bolt/45452624
It is cheaper inside the store – I was just there and it was $3.47 a yard.
Hi – How is it holding up? any weeds? is it porous enough to let water through?
A few weeds at the edges but they pull out easy because they are just in the gravel. Yup, it drains GREAT and is still holding up really well – that area is high traffic for my dogs and the felt is just fine 🙂
Great! Thank you, it looks great! i’ll go look for the felt fabric.
What is your view on using the gravel glue to keep the gravel from scattering outside of the area it is placed?
I’ve never heard of it – my only concern would be introducing something toxic in that a pet might eat or could affect water runoff.
Hi,
You did a great job. We are about create a gravel patio also and reviewing your video makes me feel that “I can do this to”.
Thanks!
Jan
What kind of gravel did you put down?
We used basic pea gravel – cheapest available!
OK thank you
Looks great. My garden soil is not level in parts what would you suggest adding more soil to level it first.
You have so many helpful hints that can be used for so many other different projects anywhere around your house other than your cute little patio. We are going to make an area in our yard like yours but we will also be using your helpful tips in a bunch of other projects. You taught me so much! Thanks so much!