

This content may include affiliate links, which means if you click on them, I may get a commission. The cool thing is, there’s no extra cost to you!
How to Stain a Fence Fast, even if it needs to be Refinished
Inside: The quick way to stain your fence, even if it is builder grade cheap wood that's been stained before. Get the full list of tools and supplies needed for a beautiful stained wood fence.
This post has been sponsored by Thompson's® WaterSeal® and Wagner SprayTech Corp. All opinions are 100% mine.
My daughter's graduation was coming up and we were throwing a big party in our backyard. The backyard that currently looked like a set from “Sanford & Son” because of our janky fence. Not exactly a house-proud situation.
I had to do something about that fence. And I had to do it quick!
When we bought our house, the reddish-brown builder-grade fences in our four year old tract neighborhood looked pretty solid. As a repo, our new home had a lot of problems that needed to be addressed right way. Staining the fence was not even on my radar.
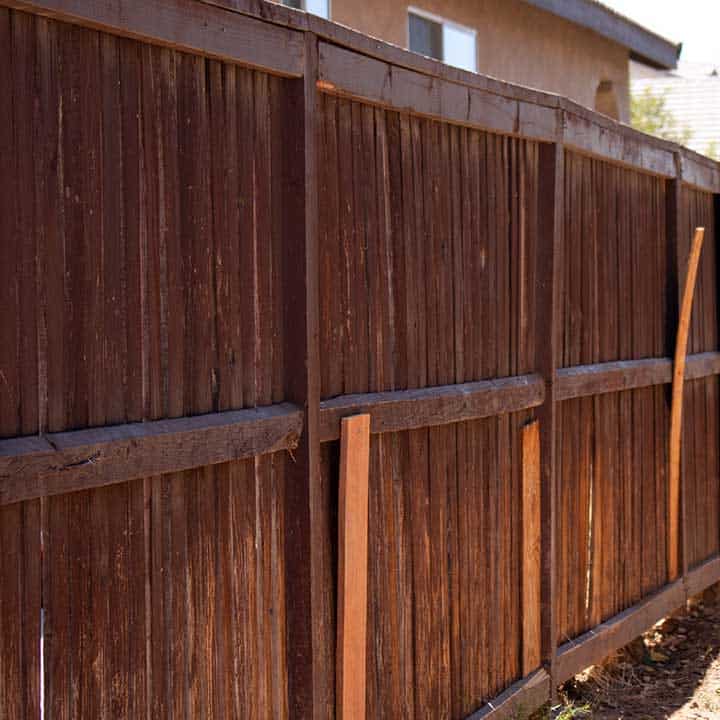
After a decade in the harsh desert climate, the cheap wood of these shoddily constructed fence panels bowed and split, the wood separating from the nails that held the wood slats to the posts. Neighbor dogs pushed panels apart and later broke the wood into pieces as they tried to fight with our dogs and cats through the fence. As a quick fix, my husband patched the holes with a hodgepodge of junkyard pallet pieces.
During 12 years in this home, I've tried everything to make my fence look better so I know exactly how to stain a fence fast … even if:
- the fence has been stained before
- the wood is pressure treated
- you don't have much time
If you're facing a similar time crunch with staining your fence, you'll find everything you need for a fast fence staining job you can do yourself that will last years:
Need a gravel patio fast? Make a gravel patio in one weekend for under $200!
Before you stain the fence, check for broken fence slats or other needed repairs. Our fence had lots of broken fence slats we needed to fix before staining.
Repair Broken or Missing Fence
We faced several repair-related challenges before we could stain our fence:
Our Side of the Fence was the “Back”
The only way to repair the slats was from the front of the fence, in either of my neighbors’ yards.
You know, in the yard of the neighbor with the vicious pit bull that broke our fence in the first place? No thanks!
The Fences Sits on the Property Line
Check the laws in your state to see what to do when a fence sits on the line between two properties. Here in California, we’d both have to agree to replace the fence and pay for the repairs.
The pit-bull-owning neighbor is a renter. The landlord has no interest in improving the property since he's already making money from the current tenants without the improvements.
My neighbor to the north wants a block wall that costs $3000. And then I’d have a boring grey wall on one side of my yard and a janky wood fence on the other side. Plus, $3000 is a lot of money.
Fence Top Was Uneven and Too Short
In our city, we can build fences up to 6-feet tall in the backyard without a permit. The fences in our backyards ranged between 5- and 5.5-feet tall. Yes, they dipped and hopped and skipped along the ground making for a very uneven line along the top of the fence.
Even worse, the neighbors’ 27-year-old adult kid still living at home could look over the fence into my yard, which is no bueno when you’re in the hot tub. Yikes!
How We Solved Our Fence Issues
If you have faced similar issues with a shared fence, I think you’re gonna love the idea we came up with. This fence solution:
- Increased the height of the fence to 6 feet
- Corrected the wonky fence line to a straight, even fence top
- Covered over all of the holes in the fence without us having to go into the neighbors’ yards
- Left the existing fence intact so no permission or funds were needed from either neighbor
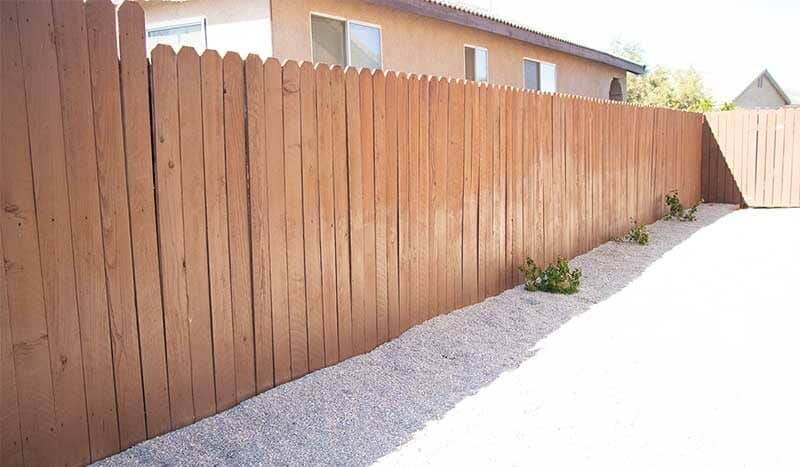
Our solution: cover our side of the fence with brand new slats of wood! We cut the fence slats to size and screwed them directly into the existing fence posts and panels.
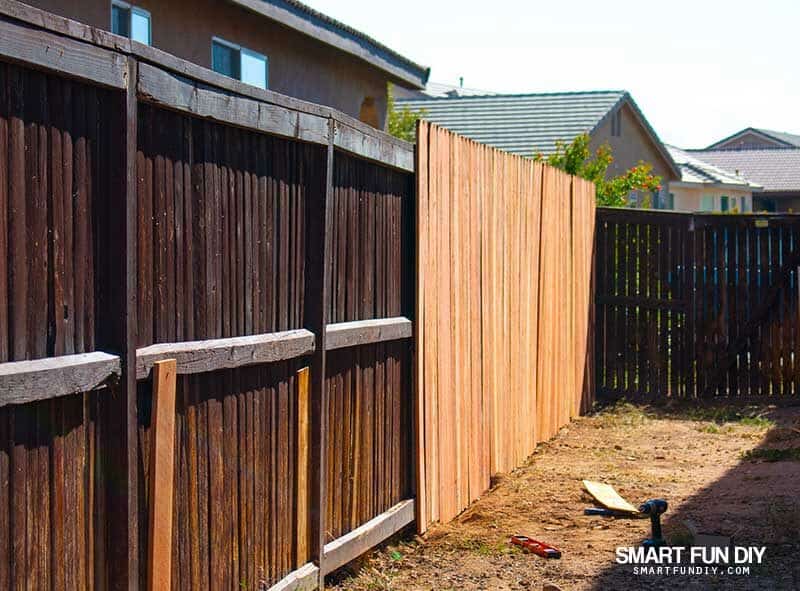
After applying the new slats, the fence was ready for a beautiful coat of wood stain.
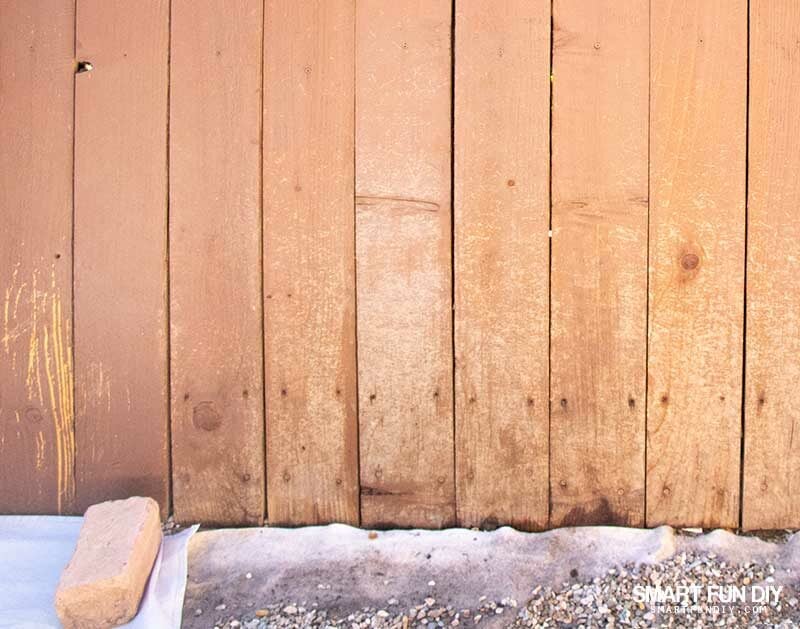
You can start staining new wood right away.
We stained this brand new wood a few years ago and it's now in need of a touch up. Extra preparation is needed to re-stain wood that was previously stained.
Preparing Your Fence for Stain
Even if you can't see it, your existing fence is already finished with stain, varnish, or paint. In order to get the new stain to “stick”, you'll need to prepare the wood.
You'll need to:
- Remove the previous finish from the wood
- Remove dirt or debris from the fence
What Happens if You Don't Prepare the Wood?
When I did a fence fix-up ten years ago, I was tempted to skip preparing the wood. My fence was so damaged from the wind, snow, and sun that I determined I could stain it without preparation.
The stain looked amazing when it went on the wood. The fence looked gorgeous … for a couple of months.
One winter wind storm later and the stain began to flake away from the wood fence.
My lesson: Do it right the first time.
While you'll stain your fence multiple times over the life of your home, you don't need to stain it every year if you prepare the wood and do the job correctly each time.
Repair Your Fence Before Staining
Make any needed repairs to the fence before staining. If you need to use new wood, it will be easier to match the new piece with the old if you stain it all at the same time.
Watch this easy to understand, short video on how to repair broken fence slats:
Cleaning a Wood Fence
Clean the wood fence before removing the stain. You'll want to remove debris from the fence, such as:
- Mud and dirt
- Leaves or vegetation
- Spiderwebs
- Insect hives or deposits
- Bird poop
You can remove the debris by:
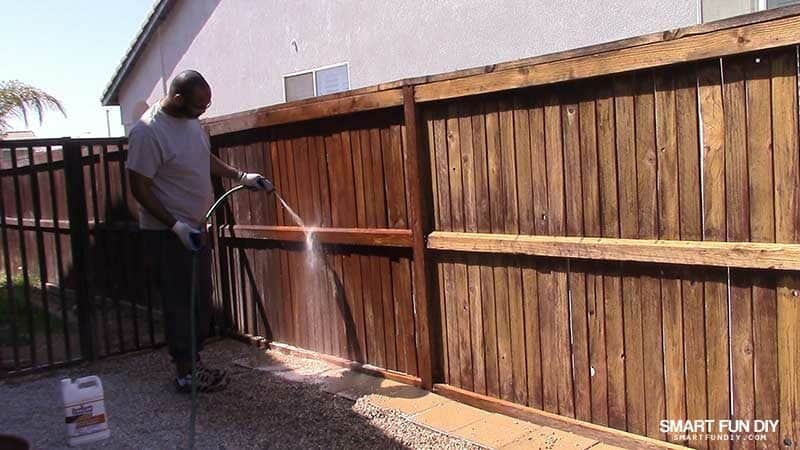
- Spraying with a high power water sprayer
- Brushing it with a broom or wire brush
If spraying the fence with water, allow the fence to dry completely before applying stain or stain remover.
How to Remove Stain From Wood
Strip the stain manually by sanding or use a chemical stripping agent to remove the stain. I chose Thompson's® WaterSeal® Maximum Strength Deck Stripper to remove the stain from our fence.
Your fence may have multiple layers of stain that have been applied over the years. Thompson's® WaterSeal® Maximum Strength Deck Stripper can remove multiple wood stain products from your fence with just one application.
Our fence had two layers of stain on it already:
- the layer that the contractors put on in 2004
- the layer that we put on in 2012
How to use Thompson's® WaterSeal® Maximum Strength Deck Stripper
- Apply the Thompson's® WaterSeal® Maximum Strength Deck Stripper to the wood
- Scrub the wood with a stiff brush
- Rinse the wood with a hose
- Allow the wood to dry
It may take a few days for the wood to dry completely, depending on your climate.
Let’s get real: If you have a backyard party this afternoon, you’ll have to embrace the raw-wood look because the wood won’t be dry in time for you to stain it today. But once the stain is removed and the wood is dry, you can apply the stain in 1-2 hours, depending on the size of your fence.
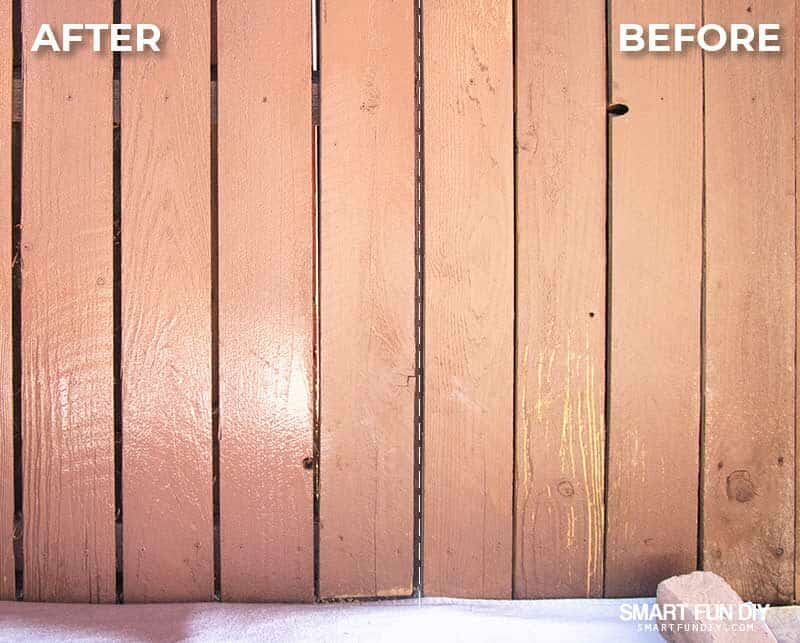
Here are the results after using Thompson's® WaterSeal® Maximum Strength Deck Stripper on our fence:
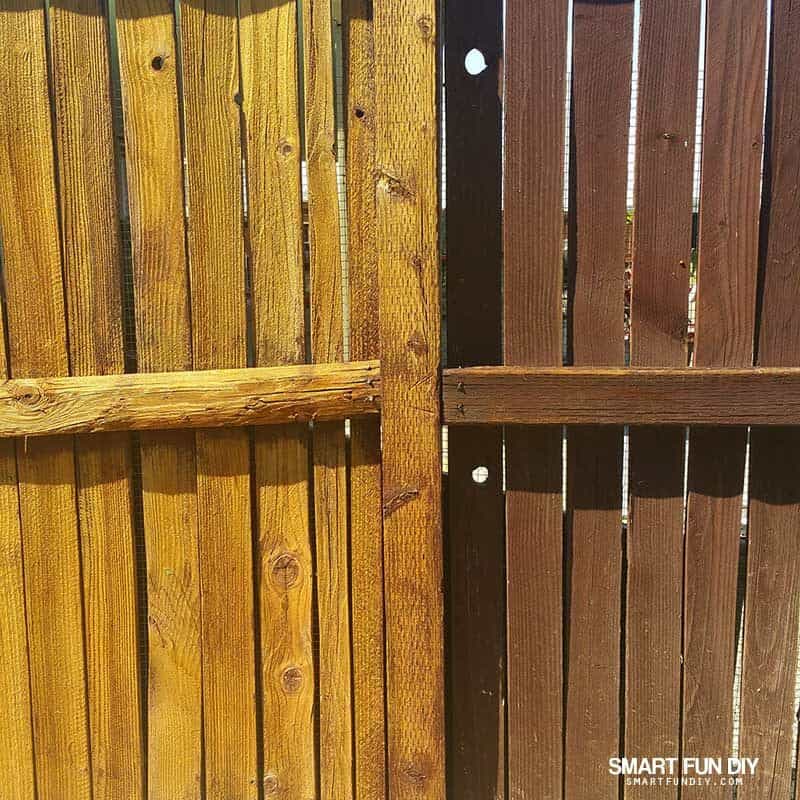
The section on the left has been treated with Thompson's® WaterSeal® Maximum Strength Deck Stripper and rinsed. It's now ready for stain!
Before you finish staining your fence, think about ways to decorate it, like these wood monogram letters.
Choosing Wood Stain for Your Fence
The skyscraper shelves of endless wood stain choices in the paint aisle of the home improvement store can be overwhelming. Which brand of wood stain is best for your fence project?
Consider these factors when choosing wood stain:
- Pressure treated wood
- Previously stained wood
- Finish type
- Stain type
Is the wood pressure-treated or natural?
Yes, you can and should stain pressure-treated wood to help it last longer. Use these pressure treated wood tips from Family Handyman.
Has the wood been stained previously?
You'll want to remove the previous stain or paint from the wood before you add new stain. I walked you through how to do that earlier in this post.
What stain finish do you want?
- Clear finish shows the wood grain and does not alter the color
- Transparent finish adds color but you can still see the wood grain clearly
- Semi-transparent stain shows some of the wood grain with some opaque color coverage
- Solid stain covers the wood in color, similar to paint but not as thick
Will you use pigment stain or dye stain?
Pigment stain is easier to use and available in ready-to-use cans from the hardware store. Dye stains require more experience to mix and use. Find out more in this article about choosing the right wood stain for your project.
Choosing a Wood Stain Color
The color of stain you choose is personal preference.
Since I wanted the wood to look similar to the other solid stained fences in my neighborhood, I chose a solid wood stain from Thompson's® WaterSeal®.
Which Brand of Wood Stain Should I Use?
My DIY loving family has been using the trusted Thompson's® WaterSeal® stains and products for decades.
Thompson's® WaterSeal® is used to protect the viewing decks at Niagara Falls! We witnessed the incredible power of Niagara Falls in person! If
Thompson's® WaterSeal® strong enough to withstand that immense pressure and weather, I think it can handle your fence.
If you want to know more about other brands to compare, get guidance from this Consumer Reports article on choosing a wood stain brand.
How to Apply Wood Stain to a Fence
A few years ago, we chose Thompson's® Water Seal® SOLID Waterproofing Stain in Acorn Brown.
We used paint brushes and rollers to apply the stain. You can imagine how long it took to paint over 120 feet of fence with a 2″ paint brush, and the rollers weren't much better …
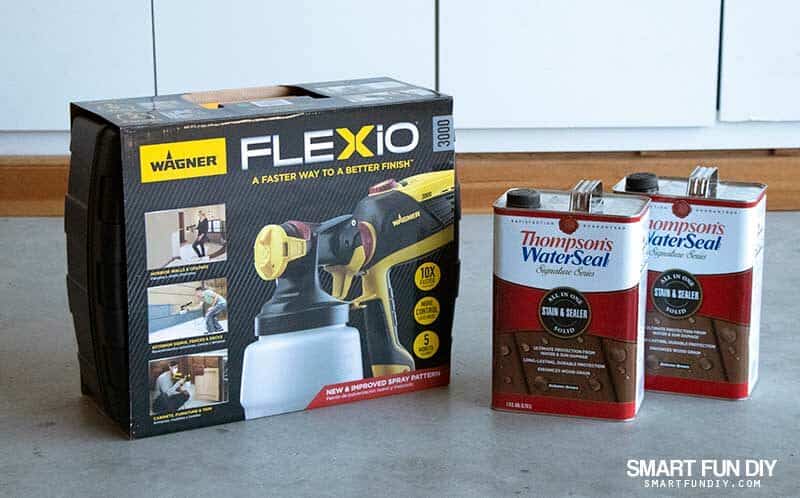
This time, we decided to apply the stain using an electric paint sprayer. Game changer!
Choosing a Paint Sprayer for Wood Stain
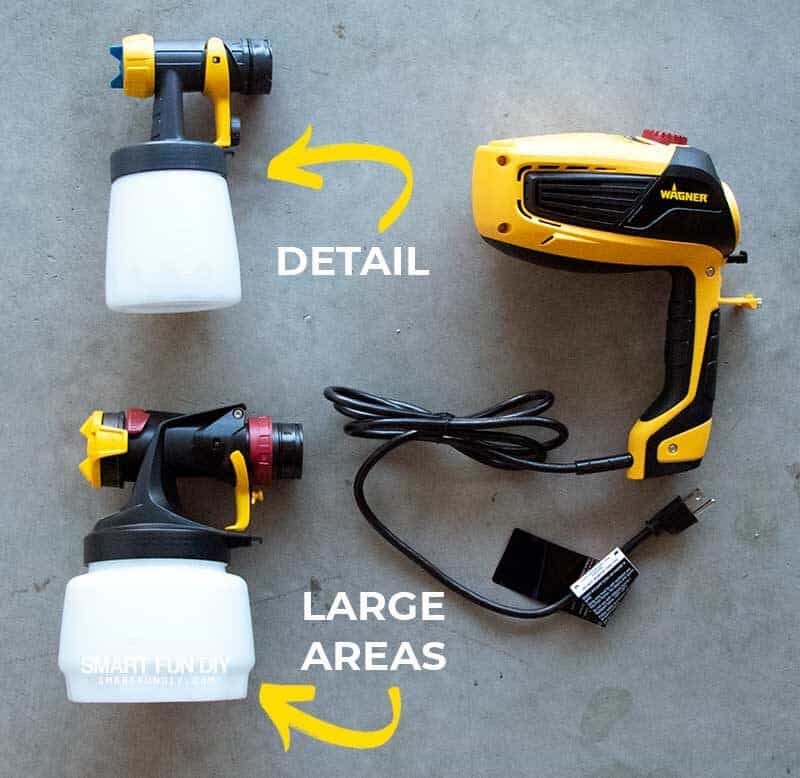
After researching paint sprayers, I chose the Wagner FLEXiO 3000 Sprayer. Our family has used Wagner products to successfully paint interior and exterior projects for years so it was a no-brainer to trust the Wagner name for this project.

Here's why I chose the Wagner FLEXiO 3000 Sprayer:
- Covers an 8′ x 10′ surface with stain in 2 minutes
- Nozzle has an adjustable control for less mess and overspray
- 2 speeds to paint walls 8 times faster than using a brush
- Can spray indoors or outdoors
- Fast clean up with just a few removable parts
- Less waste than using disposable rollers or brushes

The Wagner FLEXiO 3000 Sprayer includes:
- x-Boost™ Turbine
- iSpray® Nozzle
- Detail Finish Nozzle
The Detail Finish Nozzle is for detail projects and the iSpray® is for large projects, like staining a fence.
Setting up a Paint Sprayer for Wood Stain
Always mix wood stain well before using. The pigments and solvents in the stain separate over time while stored. You'll see streaks and variations in color and coverage on your fence if the stain is not properly mixed. Mixing ensures the stain will have the same consistency, color, and effect as you apply it across your entire fence.
If you aren't sure how to mix the stain yourself, take the bottle to the paint counter before leaving the home improvement store and ask them to mix the stain for you. Use the stain within a few hours of mixing as the materials begin to separate again if allowed to rest.
Sprayer Settings for Wood Stain
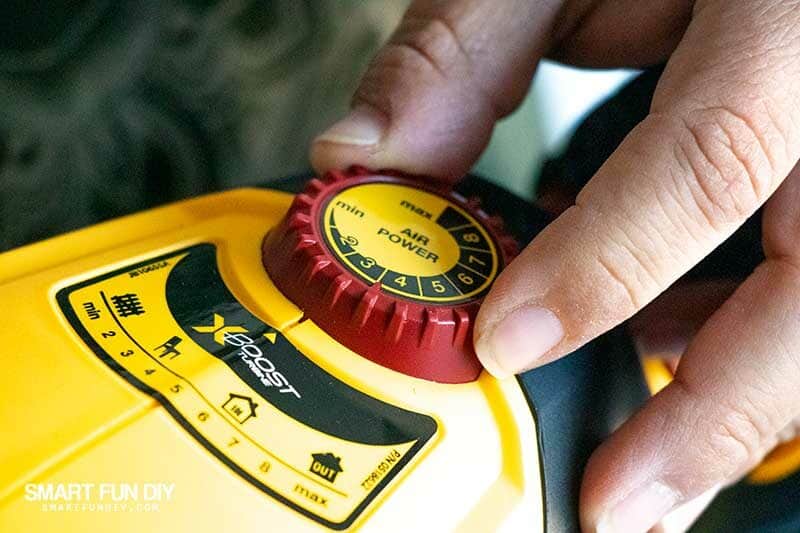
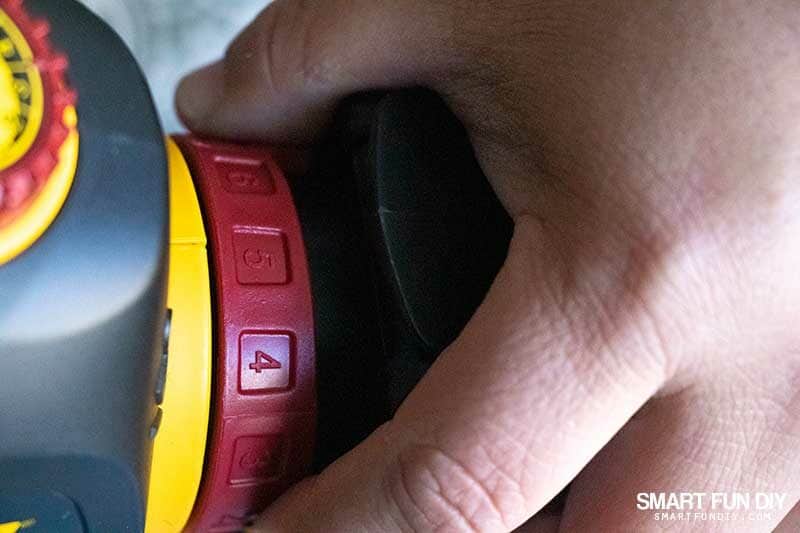
Adjust 3 different settings on the Wagner FLEXiO 3000 Sprayer to control the flow and spray pattern that the stain is sprayed:
- X-Boost™ Power Dial adjusts the level of air power produced by the turbine.
- Material Flow Control determines the amount of spray material that is sprayed from the spray nozzle.
- iSpray® Nozzle can be adjusted incrementally from 1 (minimum) to 12 (maximum) by turning the adjustable material flow control.
- Detail Finish Nozzle sets the material flow
- Spray Width Lever determines the width of the spray pattern
- Air Cap adjusts the spray pattern.
To stain a large area like a fence, choose the iSpray® Nozzle:
Prepare your paint sprayer:
1. Mix the stain well.
Check the sprayer manual to see if you have to thin the paint or stain before filling the spray reservoir. Perform any modifications you need to make to the paint or stain.
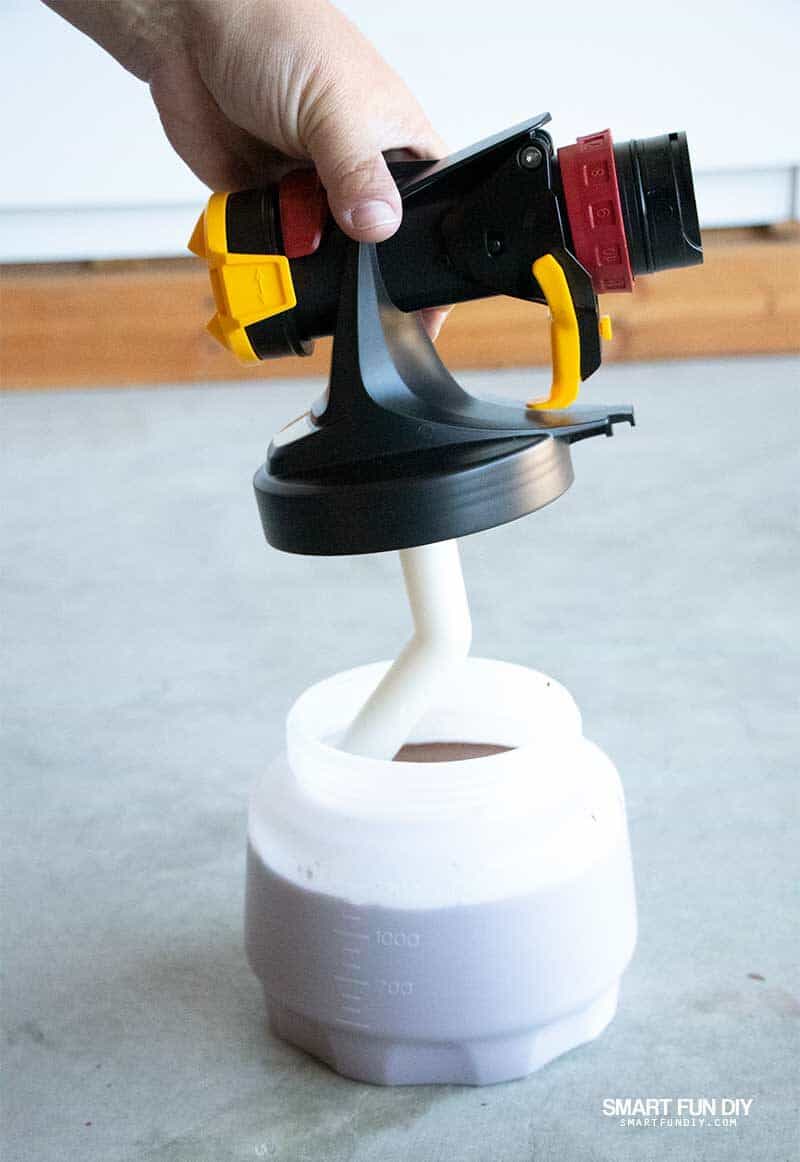
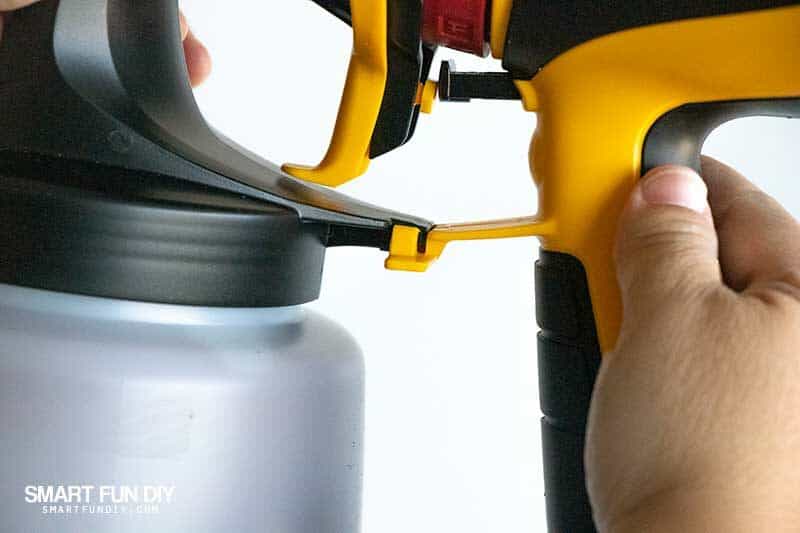
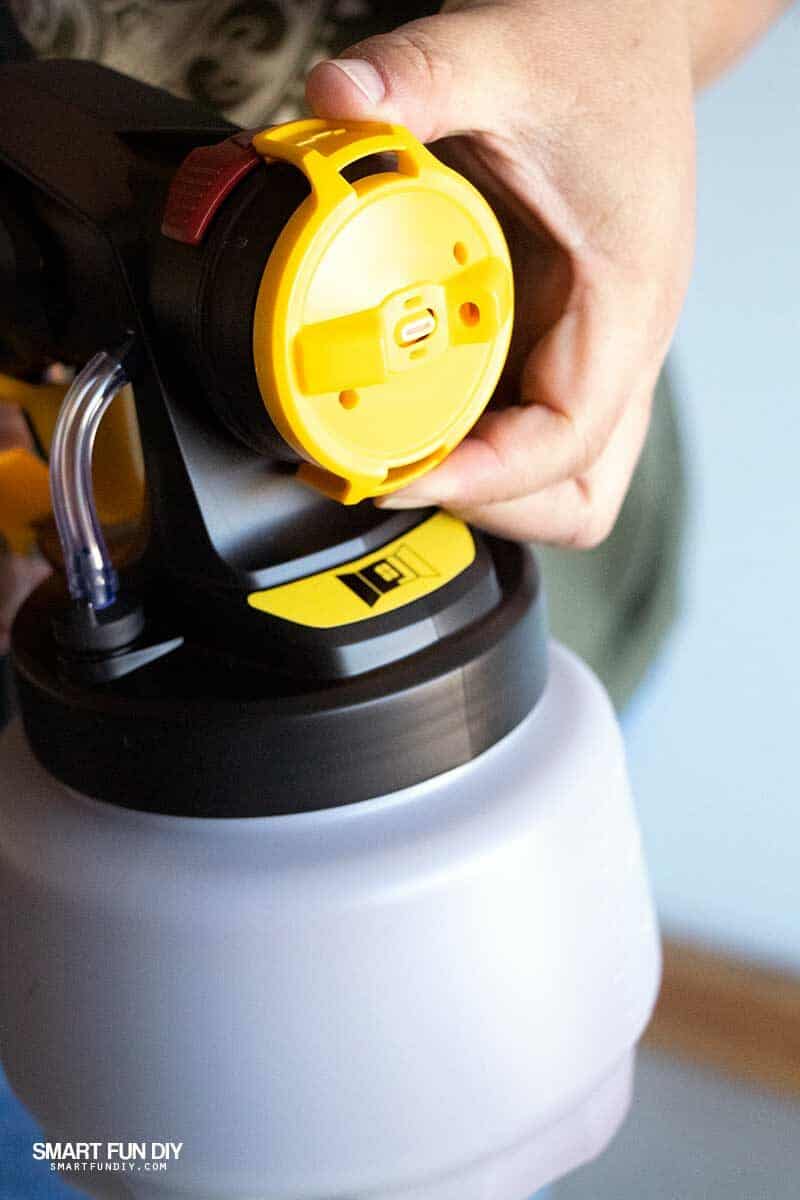
2. Detach the container from the iSpray® Nozzle. Pour the stain into the container.

3. Insert the nozzle into the container, with the tip of the suction tube facing to the front.
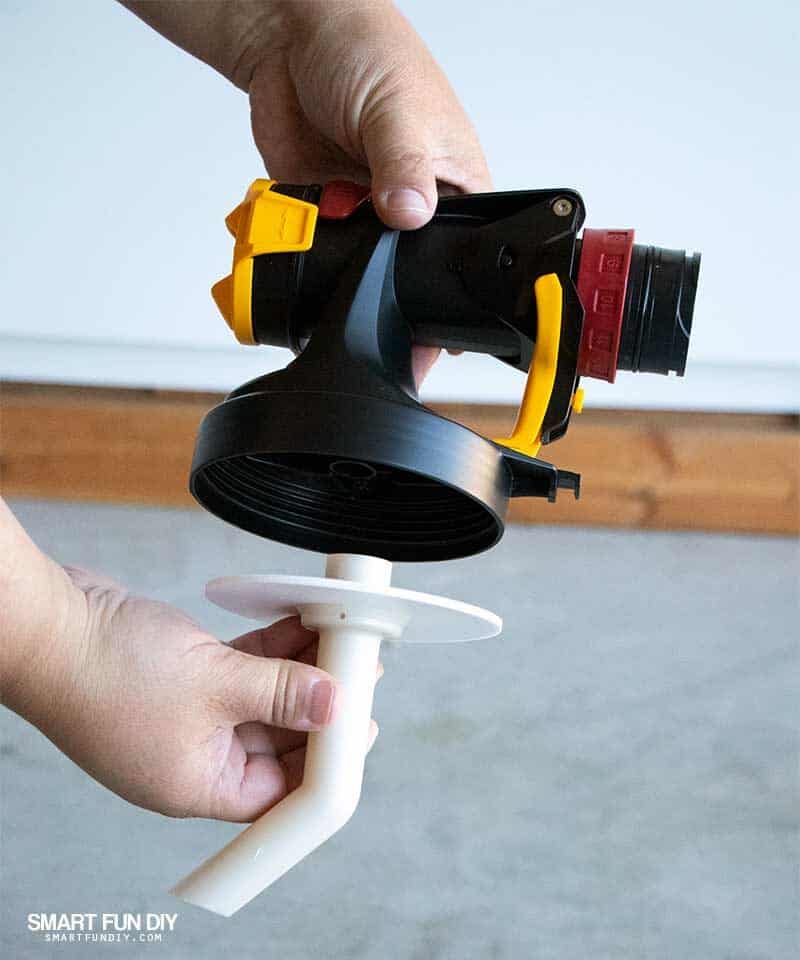
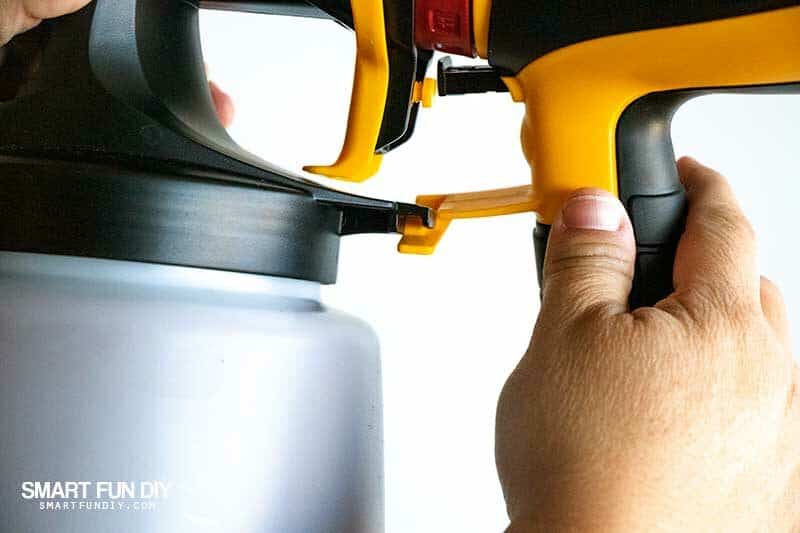
4. Insert the x-Boost™ Turbine into the nozzle. Click together.
5. Adjust the X-Boost™ Power Dial to between 2 and 4 for wood stain.
6. Adjust the Spray Width Lever. It was a breezy day so I set it to low to minimize overspray.

7. Adjust the Material Flow Control to 5 for stain.
8. Adjust the Air Cap ears to vertical for side to side spraying.
9. Plug in the sprayer.
Mask to Protect from Stain
Before spraying, mask any areas you do not want sprayed with stain:
- Shrubs and trees
- Plants and Flowers
- Ground cover
- Walls
- House
Use a dropcloth or an old sheet to cover large areas.
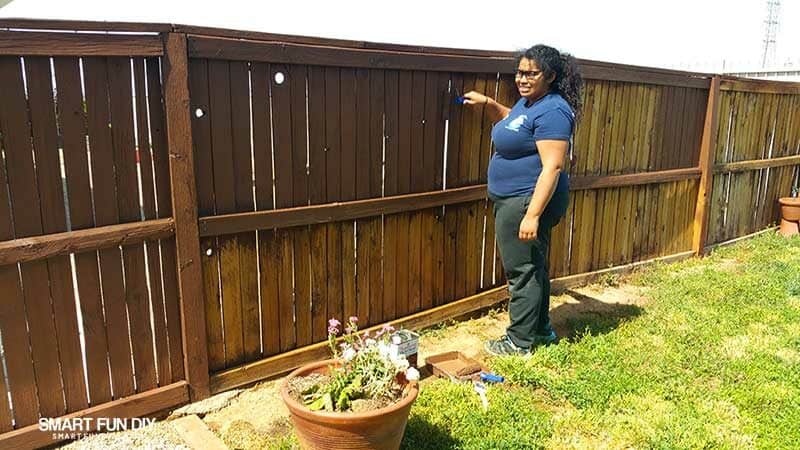
We masked a shed in front of the fence, the section of the house where the fence terminated, the plants in my raised bed garden, and the gravel ground cover.
If you need more guidance, the Wagner FLEXiO 3000 Sprayer includes a paper masking guide to help you plan the areas to mask.
Applying Wood Stain with a Paint Sprayer
Once the sprayer is assembled and container filled with stain, you're ready to stain the fence:
- Hold the sprayer 6-8 inches from the fence.
- Pull the trigger and sweep the sprayer from left to right across the fence to apply the stain. Repeat to cover the entire fence.
- Overlap the passes by 30% to ensure even coverage.
- Refill the container as needed.
Allow the stain to dry before adding a second coat, if needed.
Got leftover stain? Make these gorgeous DIY plant markers!
Check that the Stain is Protecting the Wood
After all this work, you wanna know the stain is doing it's job by protecting the wood. Here's how:
- Spray the fence with water
- Check that the water beads up as soon as it hits the stained wood
If the water does not bead up, you may need to apply a second coat of stain or apply a coat of clear sealant over the stain. Be sure to wait for the wood to dry completely before applying any more stain or a sealant.
Enjoy Your Beautiful Fence for Years to Come
You can have a beautiful wood fence in just a few hours by using a Wagner FLEXiO 3000 Sprayer to apply a quality stain like Thompson's to your wood fence. Proper preparation will ensure that your wood stain will beautify your space and protect your fence for years to come.
No more Sanford & Son junkyard fences for us!
Tell me about your ugly wood problems in your backyard in the comments! I'm sure there's a solution here …
Find out more about the products used in this project here:
Still planning? SAVE this post on Pinterest or share on Facebook so you can easily find it later:

About the Author

Jennifer Priest is a 20+ year designer in the arts & crafts industry and home DIYer with a passion for creativity. An Army veteran raised on a ranch, from her experience, she shares smart DIY projects that save money and fun craft ideas that anyone can make. Besides blogging, Jennifer is a Master Practitioner and Trainer of NLP, Hypnosis, and MER, and coaches other online entrepreneurs on money mindset, business, and living an intentional life. When not blogging, Jennifer is having adventures in the wilderness, on road trips, playing with her cats, and making paleo food.


Thanks for sharing this, we have a section of fence that needs some love so this is perfect timing!
Our fence is in need of staining, the old stain is degrading. Its going to be a big job because we have raised garden beds in front of 80 % of the fence lol.
My concern is about the back side of the fence that faces our neighbors.. it has a chainlink fence on their side so I’m not sure what to do for that side? Any suggestions would be nice.
You can talk to your neighbors about staining the other side …
Thanks so much for your advice! We got a new fence last fall and are just now getting around to staining it! I hope it all goes well
My fence has been up 3_4 years and it turned grey what can I do ?
It might be the wood you used or the stain … you may have to strip and re-stain
This seems super detailed, which I need. thank you!! I made sure to pin it with a new board so it won’t get lost in my pins! I will be doing this in the fall. Again, thank you so much!!