
This content may include affiliate links, which means if you click on them, I may get a commission. The cool thing is, there’s no extra cost to you!
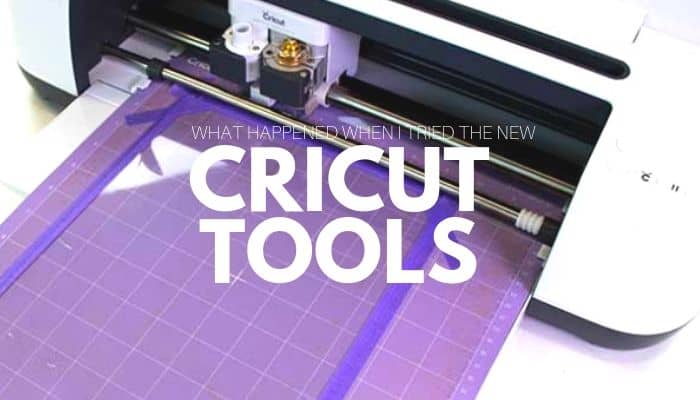
What Happened When I Tried the New Cricut Maker Tools
Inside: See each of the 4 new Cricut Maker tools in the Adaptive Toolset: Fine Debossing Tip, Basic Perforation Blade, Wavy Blade, and Engraving Tip. Learn what materials each Cricut blade can cut and see 4 inspiring projects ideas to try today.
This post includes affiliate links. When you click and purchase from these links we may get a commission from the seller. The cool thing is, this doesn't cost you any extra money!
This is a sponsored conversation written by me on behalf of Cricut. The opinions and text are all mine.
Cutting metal, engraving acrylic, debossing without folders or dies, and textured edges without a paper trimmer … it's all possible now with 4 new tools in Cricut's Adaptive Toolset:
Creating with paper is my first love. But I am totally hooked on using these new Cricut tools to create with acrylic, foil, leather, and more, like these projects I made using these four new Cricut Adaptive Toolset tools:

Why are there more Cricut tools?
Lost when it comes to all the Cricut tools and what to use them for? Maybe you're wondering why we need all of these new tools?
With the release of Cricut Maker, Cricut made a commitment to develop more tools to help makers truly create anything. The 4 new tools expand the Cricut Adaptive Toolset to allow more functionality on more materials like metal and acrylic sheets.
See a sampling of the full suite of Cricut tools in action in this video:
How to change Cricut Maker tools and blades quickly
Cricut Maker's QuickSwapTM tools allow you to quickly change the tool you’re cutting using one housing unit. The QuickSwap housing piece is included with each tool purchase and can be used interchangeably with all of the tool tips.
I love how easy it was for me to change tools when I used the Cricut Rotary Blade to make a fabric bag and then created paper greeting cards with a different tool in seconds.
The QuickSwap housing was introduced with the Single and Double Scoring Wheel and can be used for all four new tips.
- Snap the tip you want into the QuickSwap Housing
- Your Cricut Maker® will sense which tool tip is loaded and let you know if you need to change tips for your project
- The quick-release button makes changing tips fast and simple
- Check out this quick video to see QuickSwap in action
What you need to know about new Cricut QuickSwap tools
Click each link below to walk through what each new tool can do:

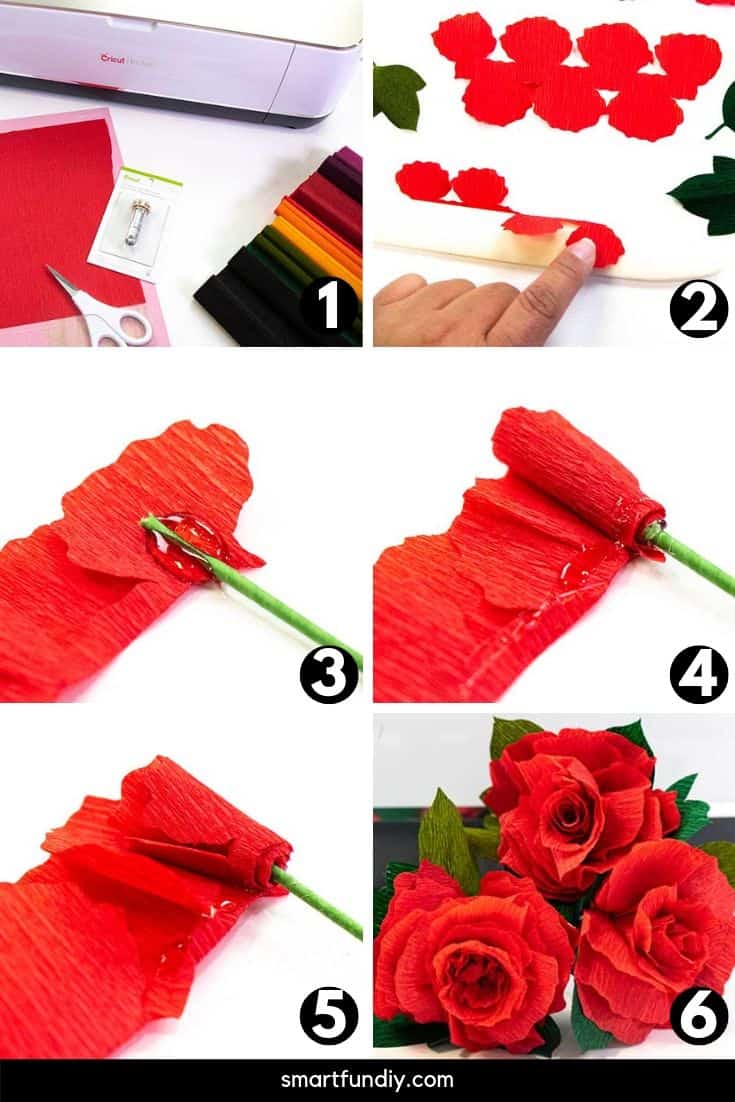
How to make realistic flowers with the Cricut Maker Wavy Blade
The texture and slight stretch of crepe paper makes it one of my favorites for creating handmade paper flowers. Cutting crepe paper by hand to make flowers is tedious and frustrating.
Create paper flowers quickly and precisely with any of the flower designs in Cricut Design Space cut from crepe paper. Add texture to paper flowers by using the new Wavy Blade rather than a straight blade to cut out the flower pieces.
I created these simple paper flowers using the Wavy Floral Bouquet Project in Cricut Design Space.
What happened with I tried to Cricut Wavy Blade
I wasn't sure that I'd like the Wavy Blade when I first heard about it. My first thought was “decorative scissors”.
Get a decorative edge in half the time than a drag blade with a gentle wave cut for a wide variety of projects. To add a whimsical wavy edge to any design, this specially sculpted stainless steel blade is great for original vinyl decals, iron-on designs, envelopes, cards, gift tags, collage projects, or any time you need fabulously finished edges and stylish design accents. Perfect for iron-on, vinyl, paper, cardstock, fabric, and more.
Cricut.com
The Wavy Blade produces a very subtle wave when cutting, creating a delicate, pretty texture. I think this blade would be perfect for adding texture to any shape, including flower designs besides the poppy design I cut for the flower bouquet project above.

Crepe paper is delicate so I chose to put it on the LightGrip mat. Since the Wavy Blade is a rotary style blade, it's not recommended for the LightGrip mat. My mat now has a wavy pattern all over it!
Tip: Use the FabricGrip or StandardGrip mats with the rotary style Wavy Blade for Cricut Maker.
What materials can Cricut Wavy Blade cut?
- Cardstock
- Poster Board
- Vinyl
- Iron-On
- Fabric
- Crepe Paper
- and more
How to make a surprise treat cone with Cricut Perforation Blade
When I read that the Perforation Blade can help create perfect tear-offs and easy peel-always, I was a bit confused as to how I would use it. Then I saw this Birthday Candy Cone project in the Cricut Design Space.
Halloween is coming up and these treat cones would be perfect for a fun party favor or teacher goodie!
Traditional treat cones or boxes are typically destroyed when opened. The perforated tab on these treat cones allows them to be opened easily. Now they can keep the “box” to use as decor later!

What materials can Cricut Perforation Blade cut?
The Perforation Blade makes it possible to turn any line, even a circle, into a perforated edge for easy tearing with these materials:
- Paper
- Cardstock
- Acetate
- Poster Board
- and more
Get the perfect tear quickly and effortlessly with precise perforation cuts for a wide variety of projects. To create uniform, finely perforated lines for any design, just snap this tip onto the QuickSwap Housing and tell your Cricut Maker to “Go!” Evenly spaced perforation lines allow for clean, well-spaced tearing without the need to fold beforehand – especially great for shapes with curves. Perfect for tear-out booklet pages, raffle tickets, homemade journals, or for any project that demands a neat tear.
Cricut.com
How to make a Halloween Treat Cone with Cricut Perforation Blade
Supplies:
- Cricut Maker
- Cricut Perforation Blade
- Cricut Scoring Wheel Combo Pack (the combo pack is no longer available but you can use this one to do the same thing)
- Cricut Premium Fine-Point Blade
- Cricut Premium Outdoor Vinyl in white
- Cricut Transfer Tape
- 2 sheets deep purple cardstock
- 1 sheet green glitter cardstock
- Adhesive
- Paper shred
- Candy

Instructions:
- Select the Birthday Candy Cone project in Cricut Design Space.
- Delete the text.
- Find a text design you like in the Cricut Design Space Shapes.
- Size the text design to fit the perforated circle on the bottom of the cone.
- Cut the text out of Cricut Premium Outdoor Vinyl. Weed. Apply Transfer Tape.
- Insert the Perforation Blade into Cricut Maker.
- Cut the cone from 2 sheets of purple cardstock, changing blades from Perforation Blade to Single Scoring Wheel to Cricut Premium Fine-Point Blade as instructed by Cricut Design Space.
- Insert the Double Scoring Wheel into Cricut Maker.
- Cut the cone trim from green glitter cardstock, changing blades from Double Scoring Wheel to Cricut Premium Fine- Point Blade as instructed by Cricut Design Space.
- Insert the green glitter tab into the slot on the perforated circle.
- Apply the vinyl saying to the center of the perforated circle for the cone, centering the tab at the bottom.
- Roll the cone into shape, inserting the tabs into the slots.
- Fill the cone with shred and candy.
- Fold up the tabs on the circle.
- Apply adhesive to the large open edge of the cone. Place circle over the opening and fold tabs up into the adhesive.
- Apply another layer of adhesive over the tabs. Apply the scalloped paper border over the tabs to create a finished look.
- Pull the tab to peel away the circle to reveal the candy inside.

Create embossed monograms with Cricut Fine Debossing Tip
Use the Cricut Fine Debossing Tip to create crisp, detailed debossed designs without folders using a variety of materials.
Add professional polish and elevated elegance to paper crafts by creating crisp, detailed debossed designs. Unlike folders, which lock you into a specific design, this rolling debossing ball, with a wider range of motion, gives you free reign to customize, personalize, and design with incredible intricacy. Make a dimensional wedding card, thank you card with your monogram, or add flourish to gift boxes, tags, and more. Creates a stunning effect on foil cardstock, coated paper, shimmer and glitter paper, basswood, and much more.
Cricut.com

First, I tried the Fine Debossing Tip on a sheet of leather. It did not turn out well, especially because I forgot to move the star wheels to the right inside the Cricut Maker before inserting the leather into the machine. The Fine Debossing Tip is also not recommended for use with thick leather.
Tip: Be sure to move the star wheels to the right every time you use a thick material in Cricut Maker to avoid the wheels pressing their grooved pattern into the material.
Next I tried the Fine Debossing Tip on metallic poster board.

OMG, I think I'm in love … the results were absolutely incredible! I thought the tip would tear the foil but it pressed gently into the foil, creating the most perfect debossed effect I've ever seen on paper.
Adding personal touches to gifts with monogrammed gift tags like this is quick and easy with Cricut Maker's Fine Debossing Tip.
Materials List for Cricut Fine Debossing Tip
- Cardstock
- Poster Board
- Foil Poster Board
- Chipboad
- Kraft Board
- and more

Create a Personalized Acrylic Sign with Cricut Engraving Tip
My son flipped out when he saw this personalized acrylic sign hanging in his room when he got home from school.
I still can't believe this professional looking graphic sign came out of my Cricut Maker! Create signs like this with any logo, image, or text you want.
You'll need these supplies:
- Cricut Engraving Tip
- Cricut Maker
- StrongGrip Cricut Mat
- 8.5″ x 11″ Acrylic sheet
- Masking tape
- Hand drill
- 1 yard of black twine

How to Engrave on Acrylic with Cricut Maker
- Insert the Engraving Tip into Cricut Maker.
- Peel away the protective plastic from the top of the acrylic sheet.
- Position the acrylic sheet on the StrongGrip mat about 1″ from the top and left sides of the mat. Secure edges in place with tape.
- Move the star wheels all the way to the right inside Cricut Maker.
- Load mat with acrylic into Cricut Maker.
- Create a rectangle or shape in Cricut Design Space that measures 8.5″ x 11″, the size of the acrylic sheet.
- Create the design in Cricut Design Space to fit inside of the rectangle.
- If engraving multiple images, such as a graphic and text, be sure to “Attach” them before sending to Cricut Maker so they stay in relative position to one another.
- Position the graphic and/or text inside the rectangle to ensure it will fit the acrylic sheet. Resize if needed.
- Delete the rectangle shape.
- Inside Design Space, position the graphic so it is centered about 1″ from the top and left side of the mat.
- Set the materials to “thick acrylic”.
- Peel away the protective plastic from the back of the acrylic sheet.
- Drill a hole in each top corner using a hand drill.
- Thread twine through the holes and knot ends to create a hanger.
What Materials can be engraved with Cricut Engraving Tip?
- Anodized Aluminum
- Stainless Steel
- Acetate
- Acrylic
- and more

My favorite new Cricut tool is …
Hands-down, I can't wait to make more projects with the Engraving Tip.
The professional looking results blew me away and it was so incredibly easy to make custom engraved projects. I see myself personalizing a lot of acrylic and metal for gifts this upcoming holiday season!
Which new Cricut tool is most interesting to you?
Learn more about Cricut Maker and these new tools at Cricut.com
About the Author

Jennifer Priest is a 20+ year designer in the arts & crafts industry and home DIYer with a passion for creativity. An Army veteran raised on a ranch, from her experience, she shares smart DIY projects that save money and fun craft ideas that anyone can make. Besides blogging, Jennifer is a Master Practitioner and Trainer of NLP, Hypnosis, and MER, and coaches other online entrepreneurs on money mindset, business, and living an intentional life. When not blogging, Jennifer is having adventures in the wilderness, on road trips, playing with her cats, and making paleo food.


I like the way you explain each project. My son in law is a huge Star Wars fan, Can you share where you found the design?
Thanks
It’s in the Cricut Design Space 🙂 Thank you!
How was the acrylic piece you engraved?
I am no clear about whether you placed the acrylic sheet on the mat top side up or down after you peeled away the plastic. And there’s no step listed for the actual engraving. Is it a cut? And then you went straight to peeling away the back protection and drilling holes. I assume that’s after you take it off the mat? I guess you are assuming a certain level of familiarity for these instructions.
Can one use it in the older Cricut?
Or has to be the newer machines? i would love a etching tool or as you say engraving.
I believe these tools only work with Cricut Maker 🙂
What is the greatest thickness acrylic (or any material really) the maker allows?
Cricut doesn’t provide a thickness limit for acrylic or acetate – see the list here: https://help.cricut.com/hc/en-us/articles/360024426554
That said, you can test with different thickeness of acrylic to see what you can get to work with your Maker.