

This content may include affiliate links, which means if you click on them, I may get a commission. The cool thing is, there’s no extra cost to you!
Cricut Maker: How to use Cricut Cutting Machine to Cut Fabric
In this article: Learn how to use the Cricut Maker to cut fabric, which fabric types Cricut Maker can cut, and tools you need to get started. Plus, a step by step tutorial to make an easy zipper makeup bag for your first Cricut Maker sewing project.
This is a sponsored conversation written by me on behalf of Cricut. The opinions and text are all mine. This post contains affiliate links – I receive a small commission when you buy from these links and it doesn't cost you anything! It's pretty rad.
The number one reason sewists get a Cricut Maker is to cut fabric. But you don't have to be a sewing master to use the Cricut Maker to cut fabric for all kinds of projects, sewing or not.
Cricut Maker can cut:
- Sewing patterns from fabric
- Digital designs from fabric
- Heat transfer vinyl for creating iron-on designs on fabric
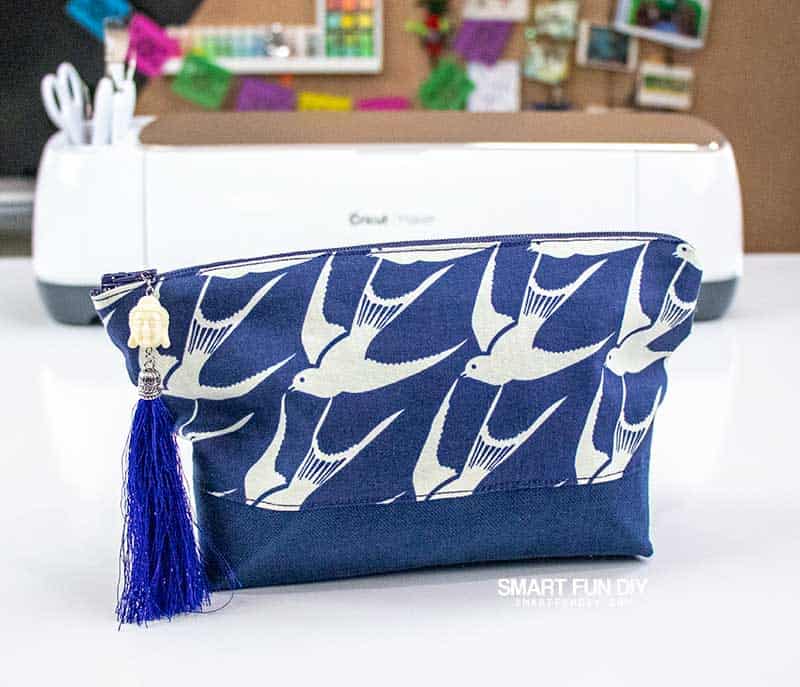
You can use Cricut Maker to cut all the fabric pieces to make projects like this:
Find out more about Cricut Maker here.
Now, before we get into cutting our first Cricut project, let's explore which fabrics you can cut with your Cricut Maker.
What Fabric Can Cricut Maker Cut?
I love crafting with felt. There's something about how soft felt feels that gives warmth and texture to simple projects to make them look rich and beautiful. Previous to getting a Cricut Maker, I had to cut felt flowers by hand or use a heavy steel rule die system that only cut flowers on one size.
Luckily Cricut Maker can cut over 50 types of fabric, including felt, with or without stabilizers. Most other digital cutting machines require stabilizers on the fabric in order to cut through the fabric. But you can cut whatever you want with Cricut Maker.
Fabric types Cricut Maker can cut:
- 2-3 oz. Tooling Leather
- Bamboo Fabric
- Bengaline
- Boucle
- Broadcloth
- Burlap
- Burn-Out Velvet
- Calico
- Cambric
- Cashmere
- Challis
- Chambray
- Chantilly Lace
- Charmeuse Satin
- Chiffon
- Chintz
- Corduroy
- Cotton
- Crepe Charmeuse
- Crepe de Chine
- Crepe Paper
- Crepe-back Satin
- Damask
- Delicate Fabrics (like Tulle)
- Denim
- Dotted Swiss
- Double Cloth
- Double Knit
- Duck Cloth
- Dupioni Silk
- Extra Heavy Fabrics (like Burlap)
- Eyelet
- Faille
- Faux Fur
- Faux Suede
- Felt, Acrylic Fabric
- Felt, Glitter Bonded
- Felt, Wool Fabric
- Flannel
- Fleece
- Flex Foam
- Foulard
- Fusible Fleece
- Fusible Interfacing
- Gabardine
- Gauze
- Georgette
- Gossamer
- Grois Point
- Grosgrain
- Habutai
- Handmade Paper
- Heather
- Heavy Fabrics (like Denim)
- Homespun Fabric
- Insulbrite Batting
- Interlock Knit
- Jacquard
- Jersey
- Jute
- Kevlar
- Khaki
- La Coste
- Lame
- Light Cotton
- Light Fabrics (like Silk)
- Linen
- Lycra
- Matelasse
- Medium Fabrics (like Cotton)
- Melton Wool
- Mesh
- Microfiber
- Moiree
- Moleskin
- Monk's Cloth
- Mulberry Paper
- Muslin
- Nylon
- Oilcloth
- Organza
- Ottoman
- Oxford
- Panne Velvet
- Peau de Soie
- Pima Cotton
- Pique Cotton
- Plisse
- Plush
- Poplin
- Quilt Batting
- Ramie
- Raschel Knit
- Rayon Lyocell
- Rib Knit
- Rip-Stop Nylon
- Sailcloth
- Satin Silk
- Seersucker
- Sequined
- Shantung
- Shantung Santeen
- Silk China
- Slinky Knit
- Spandex
- Suede
- Tafetta
- Terry Cloth
- Tissue Paper
- Tulle
- Tweed
- Ultra Firm Stabilizer
- Velour
- Velvet Upholstery
- Velveteen
- Viscose
- Voile
- Waffle Cloth
- Wool Crepe
- Ziberline
You can do a lot more than make felt flowers with Cricut Maker!
What Do You Need to Cut Fabric with Cricut Maker?
You can cut only a handful of fabric types with the basic Cricut fine point blade and mat. You'll need a few specialized tools to outfit your Cricut Maker to cut over 50 types of fabric like butter:
Some fabric projects in the Cricut Access™ Library require that you add interfacing to the back of the fabric prior to cutting with Cricut Maker. Check each project to find out whether interfacing is needed for that project.
How the Cricut Maker Cuts Fabric
Cricut Maker cuts fabric by rolling the Cricut Rotary Blade, tiny circle shaped blade, over the fabric to make the cuts. Imagine a rolling pizza cutter but a lot smaller and sharper.
Rotary Blades in Sewing
If you've been sewing for a while, you might be familiar with rotary cutters for fabric. These blades cut through multiple layers of fabric at once. Rotary blades are incredibly sharp and challenging to store. Rotary blades also require a steady hand to use properly.
What Makes Cricut's Rotary Blade Different
In contrast, Cricut Maker uses a tiny rotary blade to perform the same cuts as a traditional rotary blade tool for fabric, without any risk for mistakes.
The Cricut Rotary Blade is housed in the Cricut Maker or in a protective cover when not in use, making it safer to store than a traditional rotary blade tool.
The small size of the Cricut Rotary Blade allows it to cut intricate details are that are almost impossible to cut with a rotary blade tool on your own.
How to Install the Rotary Blade in Your Cricut Maker
- Remove the fine point blade from the Cricut Maker
- Carefully remove the cover from the Cricut Rotary Blade
- Insert the Cricut Rotary Blade into the blade housing in your Cricut Maker and lock into place
Tip: Be sure to choose the correct mat for your material when using the Cricut Rotary Blade.
Now that you have the Rotary Blade installed, it's time to make your first fabric cuts with your Cricut Maker!
Your First Sewing Project to Make with Cricut Maker
An easy sewing project will help you focus on how to get perfect fabric cuts with Cricut Maker. I searched the Cricut Access Library high and low and found this simple yet functional makeup bag pattern by Simplicity.
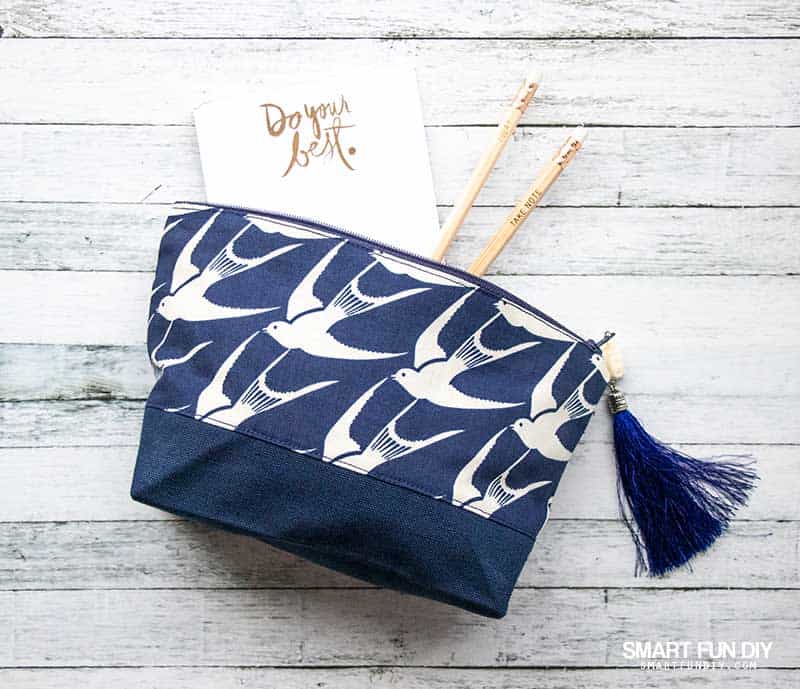
Makeup bags are perfect for organizing your craft room, around the home, and in your car.
How to Make a Car Emergency Kit Bag with Cricut Maker
I created this makeup bag as a car emergency kit for each of my family members using Cricut Maker. You can customize each bag with fabrics they love. Add their name in heat transfer vinyl to label each bag.
From a Makeup Bag to Glove Box Emergency Kit
My family are clutter bugs. I get in their cars, pop open the glove box, and all kinds of random clutter explodes out! If you're a tidy mom, you probably appreciate a well-organized glove box as much as I do.
In the past, I've used makeup bags to hold all the glove box contents. Now with three cars and three of us driving, I don't have nearly enough makeup bags to go around for my car emergency kits. With Cricut Maker, you can make as many bags as you need in the fabrics and colors you like most.
What to Put in Your Emergency Car Kit
As a lover all things organized, I keep my car glove box tidy and stocked with emergency items like adhesive bandages, medication, and snacks. But I also include items for car care.
Stock your car emergency kit with these items:
- Adhesive bandages
- Triple antibiotic ointment
- Hand warmers
- Warm gloves
- Tire pressure gauge
- Wet wipes
- Jerky, granola bars, or other shelf stable snacks
- Feminine products
- Reflective blanket
- Car registration and insurance card
- Flashlight
- Notepad
- Pen
Consider making a larger emergency kit for the trunk of the car to include a blanket, jumper cables, and other large emergency car items.
DIY Makeup Bag with Cricut Maker
You'll need a bag to hold all of your emergency kit supplies. If you have teen drivers and multiple cars, you'll want to make sure each car is stocked with it's own bag.
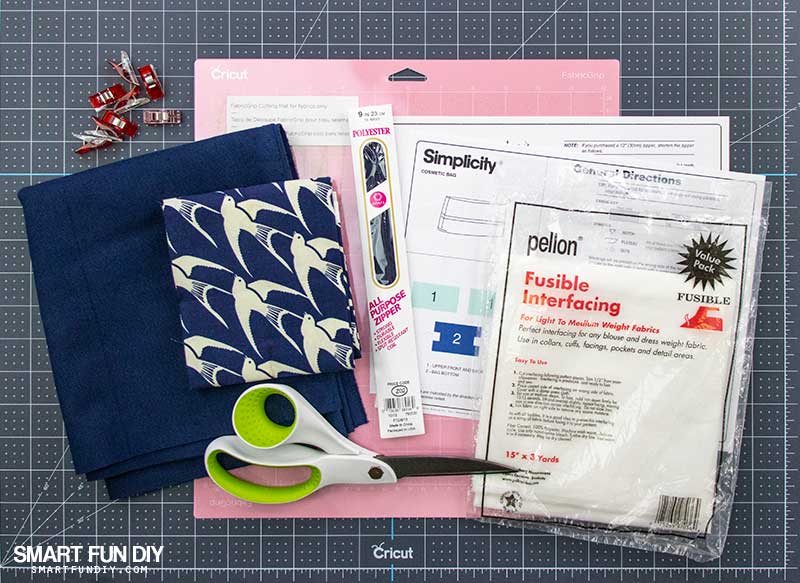
Here's what you'll need:
- Cricut Maker
- Cricut FabricGrip Mat 12″ x 12″
- Fabric for liner:
- 11″ x 8″ (8″ side with the grain)
- 12″ x 11″ (12″ side with the grain)
- Fabric for outside, upper:
- 12″ x 11″ (12″ side with the grain)
- Fabric for outside, bottom:
- 11″ x 8″ (8″ side with the grain)
- 9″ zipper
- Sewing Machine
- Thread
- Pins or clips
- Tassel (optional)
- Cricut Makeup Bag pattern – search for it in Design Space
- Directions from Cricut Makeup Bag pattern (print on printer)
The pattern says you will also need a Cricut fabric marking pen to draw lines on the fabric. These lines will help with seeing where to stitch and with lining up the gusset bottom on the bag. If you're an experienced sewist, you can skip the marker.
The bag pattern does not include a liner. A liner will make the bag look much more finished. To add a stiff liner, apply fusible web or interfacing to a thin fabric like cotton or calico. Then cut a second set of the pattern pieces.
How to Cut a Pattern from Fabric Using Cricut Maker:
Select the project from the Access Library here.
- Follow the directions to cut the fabric with scissors or a rotary cutter to fit the FabricGrip Mat.
- Place the fabric face down onto the Cricut FabricGrip mat, with the grain running perpendicular to the Cricut Maker. Cut each piece of fabric in the Cricut Maker.
- Remove each piece of fabric from the mat, trimming any corners that may not have cut completely.
- Cut all the pieces for the liner (2 sides and a bottom) and for the outside (2 sides and a bottom).

- Press the pieces so they lay flat.
- Gather the instructions, pieces, and pins.
Directions to sew a DIY makeup bag with liner using Cricut Maker:
This Cricut project includes a directions sheet to follow. If you are not an experienced sewist, the directions may be confusing so I added more steps and photos here, along with a video of how to make the project beginning to end.
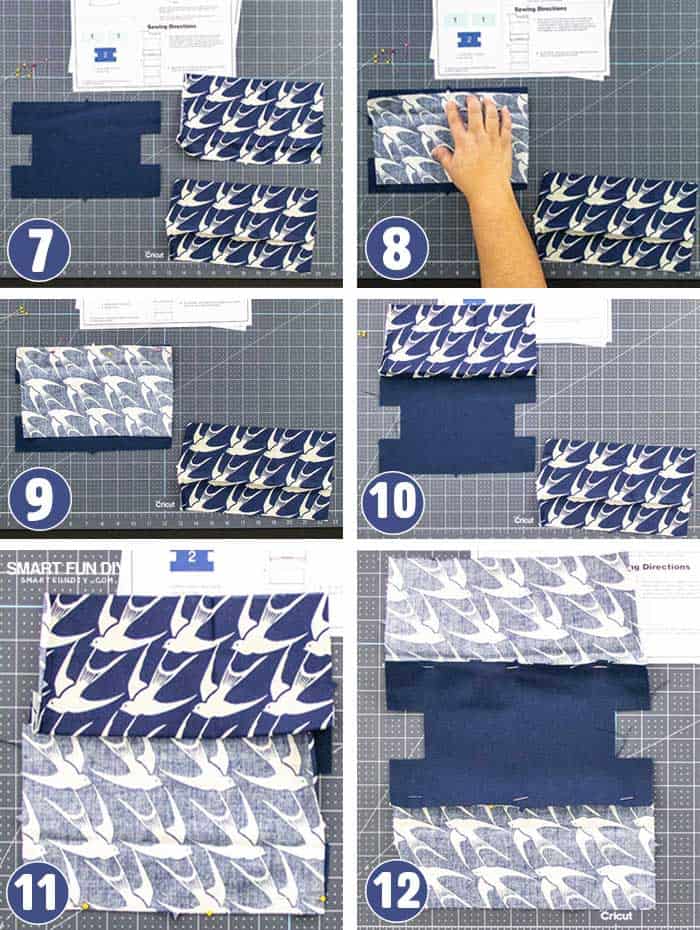
Pin the bag pieces together:
- Layout the pieces for the outside of the bag.
- Lay the right sides together for the bottom and side 1, matching up the notches.
- Pin together along the notched edge.
- Fold up the pinned fabric over to make sure the pattern is going the right direction.
- Fold the fabric back over. Position and pin the other side of the bag top to the bottom, matching up the notches.
- Both sides of the bag should be pinned to the base piece. Repeat with the pieces for the liner.
Sew the bag base together:
- Sew with 3/8″ seam allowance along the pinned areas. Press the seams up on each side with an iron.
- Check that the seams are facing up on each side of the bag bottom.
- Press a 1/4″ seam on the top raw edges of the fabric. Stitch this flat.
- Fold these stitched seams down about 3/4″ to 1″. Press.
- Baste these flaps down (using long straight stitches you can easily remove with a seam ripper later).
- Check that the basted stitches are large an will be easy to remove later.
TIP: don't like frayed fabric edges? Use a serger machine for all of the hidden inside seams.

Next, add the zipper:
- Pin the liner to the back of the zipper
- Repeat on opposite side of zipper.
- With a zipper foot, stitch the zipper to the liner.
- Pin the outside of the bag to the front of the zipper, wrapping the outside of the bag around the wrong side of the liner. Leave about 3″ unpinned and unsewn for turning later.
- With a zipper foot, stitch the zipper to the outside of the bag.
- Make sure to leave the 3″ gap for turning.

- Turn the bag so both the liner and outside are inside out.
- Stitch the sides of the bag closed.
- Flatten the gusset sides of the bag on each side and stitch closed. The side seam should be in the center of the gusset.

- Turn the bag right side out using the 3″ gap between the zipper and outside of the bag.
- Stitch the gap closed.
- Trim any stray strings.
Add a tassel to the zipper pull using pliers and a jump ring (get the how-to here).

Watch this video to see the whole project from start to finish:
Adding A Monogram with Cricut EasyPress 2
Once you've finished sewing the bag, you can add an optional monogram or name with Cricut Everyday Iron-On. Here's how:
- Cut a monogram or name from Cricut Everyday Iron-On transfer material. Mirror the image before cutting.
- Weed the heat transfer using a Cricut BrightPad and Weeding Kit.
- Position the heat transfer onto the bag.
- Apply the heat transfer with the Cricut EasyPress 2.
- Peel away the carrier sheet from the heat transfer vinyl.
Now the bag is ready to fill your emergency supplies and put into each person's car.

Want to learn more? Check these out:
- Cricut Maker Review
- Cricut EasyPress 2 Review
- Find out more about Cricut Maker here.
IF you enjoyed this project, please share it on Facebook and Pinterest!

About the Author

Jennifer Priest is a 20+ year designer in the arts & crafts industry and home DIYer with a passion for creativity. An Army veteran raised on a ranch, from her experience, she shares smart DIY projects that save money and fun craft ideas that anyone can make. Besides blogging, Jennifer is a Master Practitioner and Trainer of NLP, Hypnosis, and MER, and coaches other online entrepreneurs on money mindset, business, and living an intentional life. When not blogging, Jennifer is having adventures in the wilderness, on road trips, playing with her cats, and making paleo food.


Jennifer, thank you so much for your expert instruction!! ? This was a very informative and beneficial post and video!! I am a novice sewer, and just bought a Cricut Maker to make stuffed animals to be a bundle for a children’s book I will be publishing.
You are incredible!!
What a great post. Thanks so much. I make fabric jewelry and need to cut out pellon. Do I use the felt blade and settings?
I just got Circuit Maker and i am in love with your guide to cut fabric for sewing and sublimation projects.