

This content may include affiliate links, which means if you click on them, I may get a commission. The cool thing is, there’s no extra cost to you!
Chalk Paint Table Makeover
Ever look at your table one day and think “OMG, what the heck happened here?” Nine years into our kitchen table and I was ready for a makeover. I'd heard all this chatter about how easy chalk paint was to use … but was it REALLY that easy? Our kitchen table already looks like CRUD so what did I have to lose? This chalk paint table makeover came out even better than I imagined!! If I knew chalk paint was this easy to use, I would have painted this kitchen table and chairs years ago.

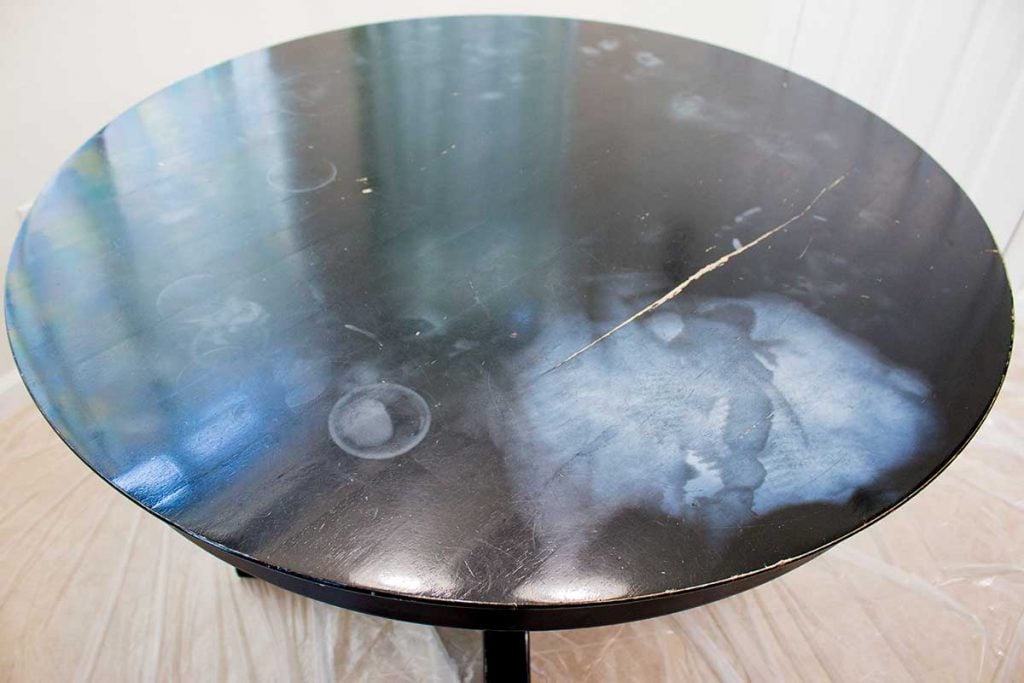
When we bought our house just over 9 years ago, I had a bonafide breakfast nook for the first time ever. Being first time homeowners, we were naturally on a budget so when I saw a table with 4 chairs on clearance at Target for under $100, I snagged them up! Problem was, the table had a scratch on it. I figured no biggie at the time but over the years, the scratch grew to more of a GASH. And the table top started getting weird hazy marks in the finish. It was going to need a total overhaul.
Today I am also super excited to be sharing this project as part of the Thrifty Style team … we share anything thrifty, free, heirloom, hand me down that can be used in the home. I love smart DIY ideas and reusing old items is a totally smart DIY!
![]()
Scroll to the end of the post to see all of the projects and visit each blog for even more “Thrifty Style” inspiration.

Now, back to this chalk paint table makeover … all the things I heard about chalk paint being easy to use were validated. But get this: it's even affordable too! You can find ALL of the supplies to makeover a table like this at WALMART. Yes, Wally World!

This makeover cost under $50 and you'll have paint leftover to do other projects to coordinate or in other places in your home. Plus, you can choose ANY colors when you do your own kitchen table makeover with chalk paint.
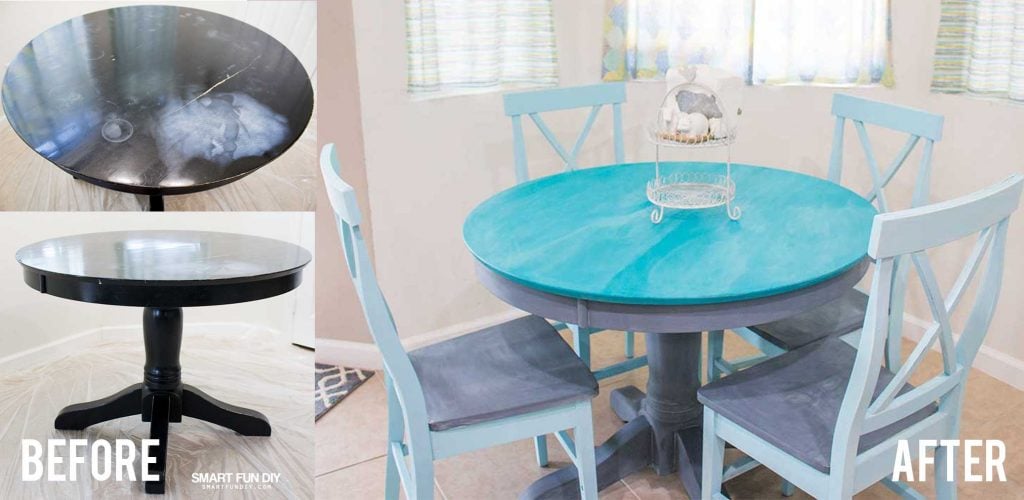
What do you think of the before and after? Totally different table, right?!
Why choose chalk paint for a kitchen table makeover?
Like I said before, I got this table and 4 chairs on clearance for $90 at Target because had big scratch. That scratch had bothered me more and more over the years but I was clueless about how to fix it. I wanted a durable finish on the table and I knew it would be nearly impossible to match the sheen and color of the black paint and sealer on the table from the manufacturer.

When the finish started to get hazy and this giant white cloud appeared on it, I was ready to throw it out. I had always wanted to try chalk paint but I was scared. I mean, it's MATTE paint and somehow it's not gonna look like total crapola later when you're putting food and fingers all over it? I just found this whole “paint with chalk paint then wax it and its sealed.” Sounded like a bunch of hocus pocus to me …

But the table looked SO BAD, what did I have to lose? I used the chalk paint on a few craft projects over the last few years and started feeling alot more confident about how to apply chalk paint and its abilities to cover just about everything. I made this DIY Vintage Style MARKET Sign for Kitchen for my kitchen and this DIY Coffee Station with chalk paint.
Chalk paint is basically self-priming meaning you don't need to do (as much) prep before painting with it, which saves a lot of time. Because the paint is porous, which allows it stick well to almost any surface, it needs to be sealed. The best sealant for chalk paint is wax, which needs to be applied about every 6 to 12 months, depending on how heavily the piece of furniture is used.
How to chalk paint a kitchen table
First, you've got to choose colors. I chose Waverly Inspirations Chalk Paint because my kitchen FAST No Sew Curtains were made with Waverly Fabric and I just like the colors. Waverly Inspirations Chalk is an acrylic paint formula with a matte chalk finish that requires no prep. This specially formulated paint works beautifully when layered and is easy to distress. The rich colors chosen from Waverly Inspirations Fabrics make it perfect for any home decor project, and the durability makes it perfect for large-scale, heavily used furniture pieces.
Product for this post was provided by Plaid Crafts as part of my work as a Plaid Crafts Ambassador. This post contains affiliate links – when you click and purchase from these links, the seller gives us a small commission that helps keep the lattes flowing so we can bring you more Smart Fun DIY ideas like this! Thank you for your support.
I could not find a gray we color that matched our kitchen cabinets well so we mixed our own in a new empty paint can using Plaid Crafts Folk Art Chalk Paint in Black and White and a paint stirring stick. Since we used a new paint can, we could seal it when done and save the excess paint in case touch-ups were needed later on.
There are a few different colors of wax to choose from with chalk paint. I chose white wax because it results in a brighter, cleaner look. Our newly remodeled kitchen has clean lines with a touch of farmhouse so the brighter, white waxed table fit right in. Plus I feel like the dark waxes make a piece look dirty.
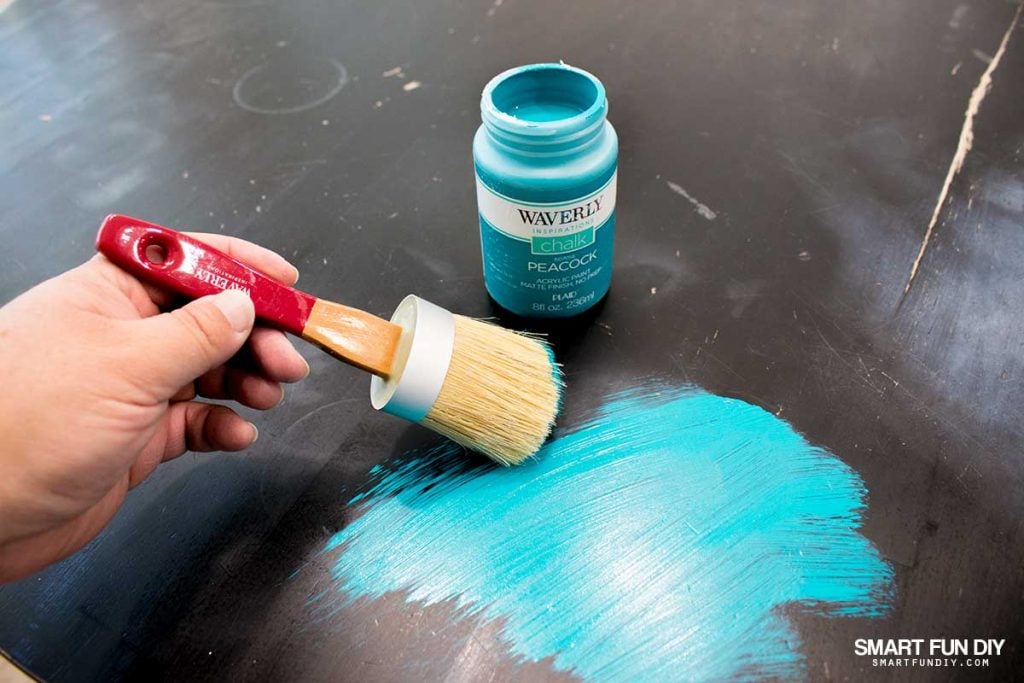
We painted the base of the table with the grey paint that we mixed. We painted the top of the table in Pool and the sides in Peacock. For the chairs, we painted the seat grey and the rest in Pool to make them feel lighter.

Here are all the supplies and tools you'll need to do your own chalk paint table makeover:
Supply list:
- Waverly Inspirations Chalk Paint, Peacock, 8 oz – Walmart.com

- Waverly Inspirations Chalk Paint, Pool, 8 oz – Walmart.com
- Folkart Home Decor Chalk Finish Paint 16oz-White Adirondack – Walmart.com
- Folkart Home Decor Chalk Finish Paint 16oz-Rich Black – Walmart.com
- Waverly Inspirations Brushes, Chalk & Wax Brush set – Walmart.com
- Waverly Inspirations White Wax Sealer and Protectant by Plaid, 8 oz. – Walmart.com
- Husky Plastic Drop Cloth, 0.7 Mil, 3-Pack – Walmart.com
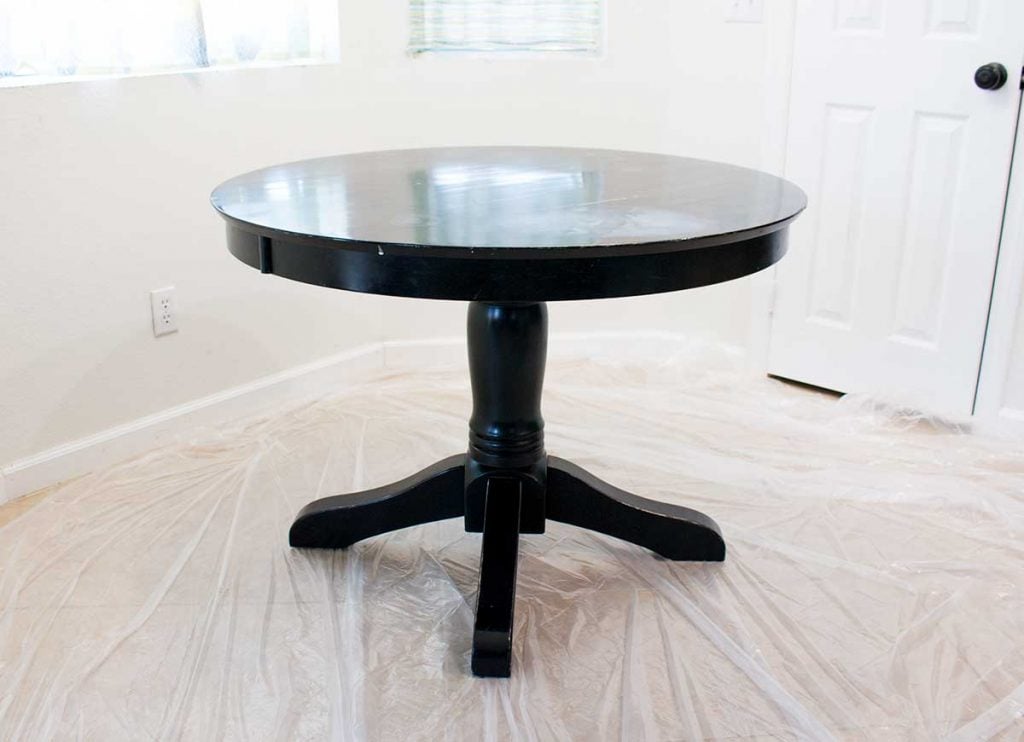
The next step is prep. I didn't want to paint the table outside because I live in the desert and it's really dusty. Additionally, we were getting our patio roof replaced at this time so even the garage was extra dusty!
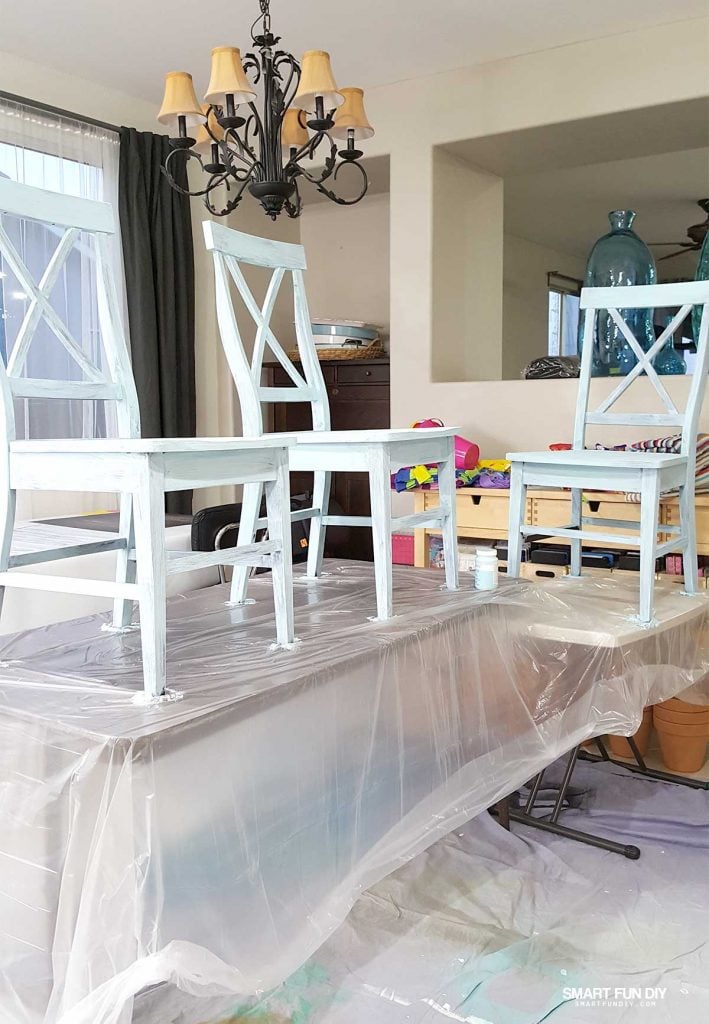
To paint inside, spread a dropcloth over the floor and surrounding area and set the table on top. We covered folding tables with plastic sheeting and then put the chairs on top so they would be easier to paint.
Even though chalk paint “sticks to everything”, it's a good idea to lightly sand all surfaces to make sure they are smooth and ready to accept the paint. After sanding, lightly buff away any sawdust with a soft damp cloth. Allow the wood to dry.
The painting directions for each brand of paint vary so refer to the product packaging before painting. For this Waverly Inspirations Chalk Paint I brushed it on with an oval chalk paint brush. These brushes hold a lot more paint that a traditional paint brush which makes the painting go by super quick and easy.

I did two coats of paint on the base, top, and sides of the table just to get really good coverage. One coat is really all you need.
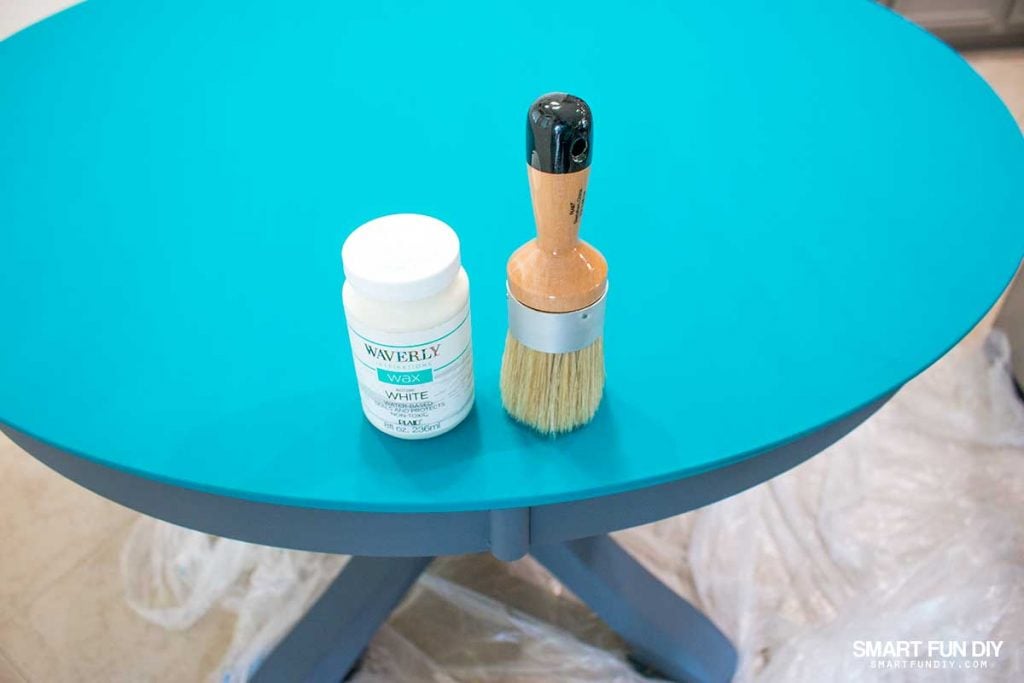
After painting, it's time to wax. You'll want to allow the paint to dry at least 24 hours before waxing it. Use a wax brush to brush the wax into all the crevices of the painted surfaces. Then buff the wax with a soft cloth. Allow the wax to cure for at least 24 hours before using the furniture.

Six months later and the table and chairs are holding up great! We wipe it down every night and eat 3 meals a day on it. There are a couple of small scratches but they look fine. and since I have paint leftover, I can touch them up easily. The paint manufacturer recommends that you reapply wax every 6 months so I plan to do that soon.
Do you have a kitchen table that needs a makeover? Let me know what you plan to do, down in the comments!
Looking for more DIY inspiration on a budget? Check out all of this month's Thrifty Style team projects here:
About the Author

Jennifer Priest is a 20+ year designer in the arts & crafts industry and home DIYer with a passion for creativity. An Army veteran raised on a ranch, from her experience, she shares smart DIY projects that save money and fun craft ideas that anyone can make. Besides blogging, Jennifer is a Master Practitioner and Trainer of NLP, Hypnosis, and MER, and coaches other online entrepreneurs on money mindset, business, and living an intentional life. When not blogging, Jennifer is having adventures in the wilderness, on road trips, playing with her cats, and making paleo food.


Great makeover…and great save! Your set looks brand new!
Thank you so much! We are loving it 🙂
Beautiful makeover, Jennifer! I love the colors you chose. I have been considering a chalk paint makeover of my dining room table and chairs, I’m still on the fence, but your makeover has definitely added another checkmark to the yes column. 🙂
That’s a great table makeover!
I have wanted to try this. Thanks for giving me the confidence that it is easy enough and can turn out great. Love it.
I didn’t even know Walmart sold chalk paint! Where have I been! Love the colors you chose. Now I’m running off to Wally World to find the chalk paint!
It looks fantastic, Jennifer! What a wonderful transformation. Pool is my all-time favorite of the Waverly Chalk…and with that white wax is truly fabulous. Such a great makeover.
Welcome to the Thrifty Style Team Ms. Fundiy! As for chalk paint, it has saved many an item in my home for sure.
Hi Jennifer! I am just now getting around to seeing your painted table and chairs. Love the happy colors, and I had no idea that you could find chalk paint at Walmart! I painted a tabletop that I use on our front porch with chalk paint about 5 years. I have never rewaxed it and it has held up beautifully even though it’s exposed to hot sun and rain. I’ve never used the white wax but after seeing your project, I definitely will use it soon.
The colors are bright and cheerful and it’s a beautiful transformation. Thank you for sharing with us this week at Celebrate Your Story and we hope you will join us again next week.
What a fantastic makeover. Thanks for sharing at the Snickerdoodle Create Bake Make Party.
I love chalk paint and I love the way your table turned out. What did you do to it to get the marble/wavy look? It’s beautiful!!
Thanks! That’s the wax 🙂
How is your table holding up? I’m considering painted my solid wood cherry stained table with chalk paint but I’m curious as to whether to the chalk paint can hold up against plates being used right on it without using placemats? I have to be so careful with my table now since it’s a shiny cherry finish. Please let me know your thoughts. Thanks.
It held up a couple years until I sold it in a yard sale when I moved. I used plates right on it … and even cooked on it.
I know this is an old post, but I was wondering how you got the slight streaking effect on the top? This is exactly what I want to do to my table. Right down to the colors! I moved from a house with a seperate kitchen/ dining area to an open concept and now I have to b
lend the color/style schemes.