
This content may include affiliate links, which means if you click on them, I may get a commission. The cool thing is, there’s no extra cost to you!
Pretty Little Altered Frames – A Blog Hop
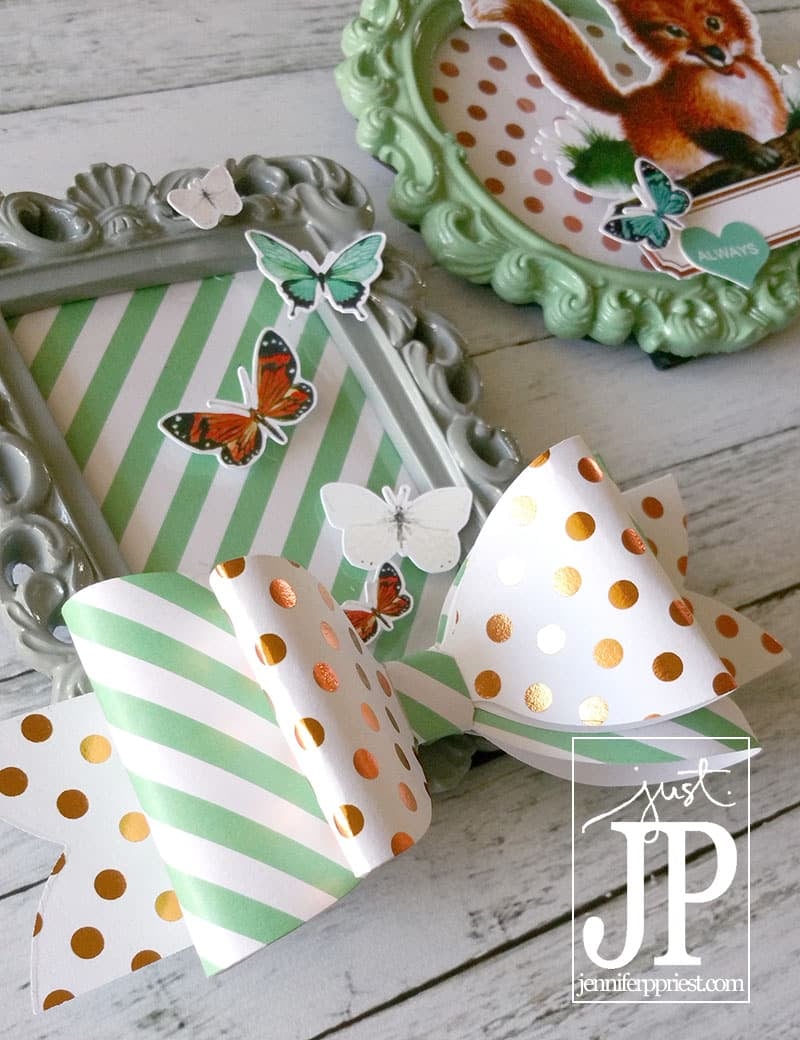
Do you love pretty paper? I love pretty paper projects and but sometimes I feel like they are major dust collectors. What do you do with all of this STUFF after the season or holiday is over? I created these pretty little altered frames with their future use in mind. I was sent a selection of gorgeous papers, diecuts, and paper items from Pretty Little Studio to use in conjunction with Tombow USA adhesive and I was so inspired by the cuteness of Pretty Little Studios' designs. The thing about pretty papers is that we want to SEE them. Inside of a scrapbook, I may see those little pretties maybe once or twice a year because I just don't look through all of my scrapbooks all that often. Scandalous, right? But, hey, we're all about truth here. I had two things I wanted to happen: I needed a practical item for my house AND I wanted to see the pretty paper and embellishments from this kit day-to-day. I create these pretty little altered frames to address both of those wants that I had.
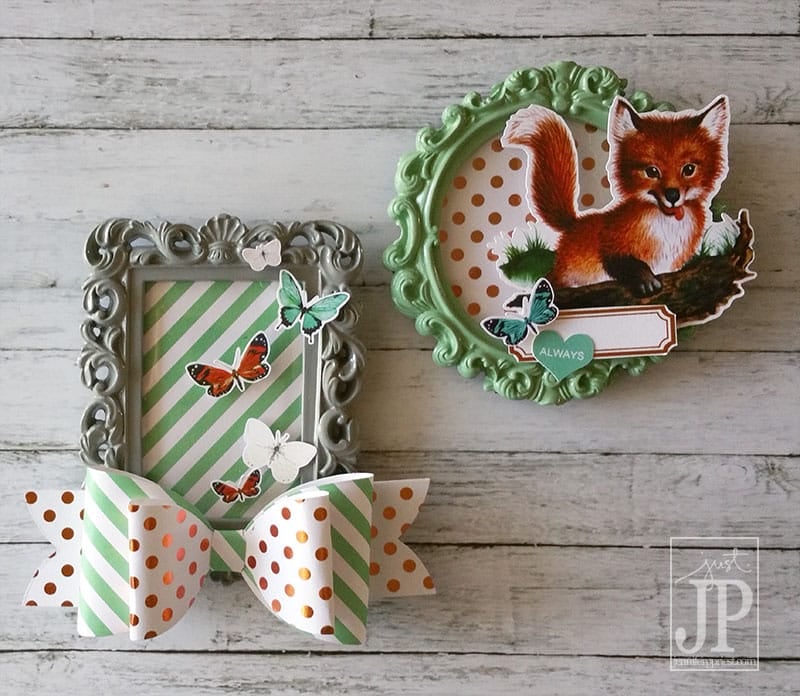
These two frames are super pretty, right? But if you know me, I need things to be more than just “pretty”. Where's the brains in this project? Well, here's what makes this project useful:
- I added magnets to the back so these can be used on any metal surface as a decorative fancy magnet
- The picture frame part is still functional – I can add a wallet photo or a small picture to either of these easily, inside or on the outside of the frame
- The Tombow adhesive I used (Tombow Xtreme Putty, Tombow Foam Tabs, Tombow Xtreme Tabs) is strong but I can pull any of these items off of the frames and use them on another project later
- These are small and don't take up a lot of space
Here's how to make these pretty altered frames with Pretty Little Studio and Tombow products:
I bet you have some pretty little frames like this somewhere in your stash. I'd love to see you make something cute and functional wit them! Here are a few more images of my frames to give you some more ideas… let's make it happen 🙂


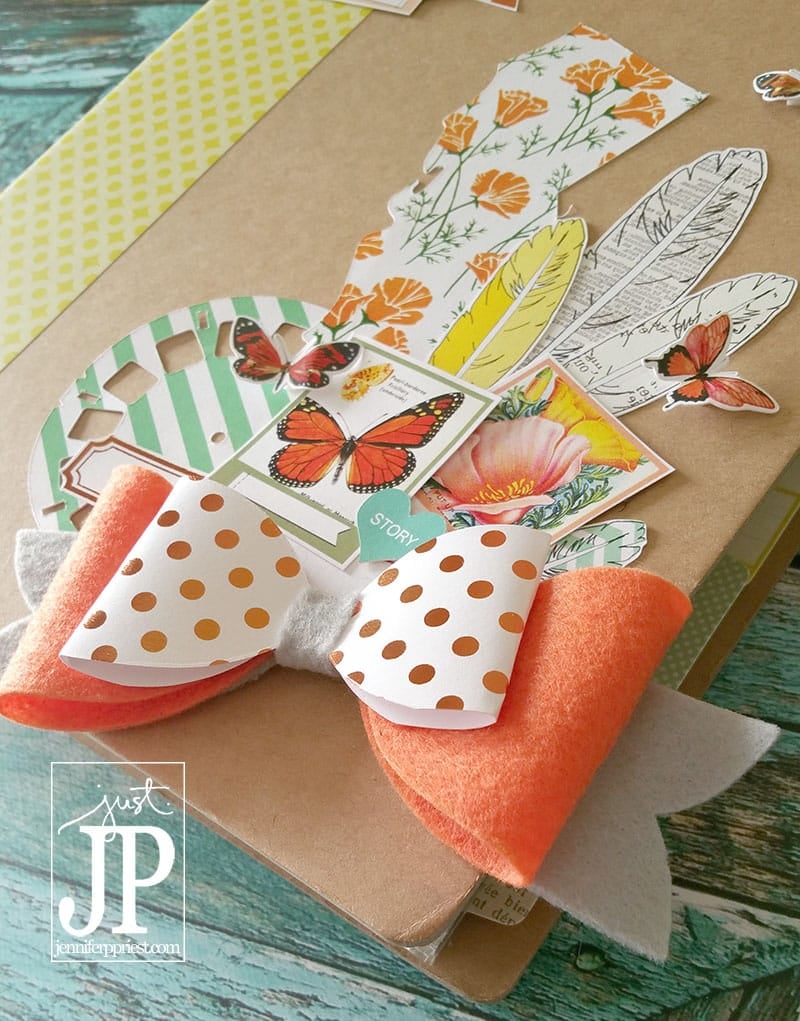
I also made a second project with some of the goodies from Pretty Little Studio: a travel memories album to hold all of our family adventures. Since we're based in California and alot of our fun happens here, I decided to order some California Poppy themed die cuts and paper from Pretty Little Studio. I have never seen this from any company before so it was pretty cool to see authentic California Poppies for paper crafts! I cut a California state shape from the 8×8 California Poppy paper with my Sizzix eclips2 machine and added that to the cover to really amp up the whole California theme. I'll be sharing a video of how I made this album cover in a few days but here's a sneak peek:
Here are the supplies you'll need for the projects I shared today – some of these are affiliate links which means if you click the link and make a purchase, I get paid a few coins. It helps keep the lights on so I can keep on blogging. Thanks in advance for your support, friends!
About the Author

Jennifer Priest is a 20+ year designer in the arts & crafts industry and home DIYer with a passion for creativity. An Army veteran raised on a ranch, from her experience, she shares smart DIY projects that save money and fun craft ideas that anyone can make. Besides blogging, Jennifer is a Master Practitioner and Trainer of NLP, Hypnosis, and MER, and coaches other online entrepreneurs on money mindset, business, and living an intentional life. When not blogging, Jennifer is having adventures in the wilderness, on road trips, playing with her cats, and making paleo food.


Wow, Jennifer this is amazing! I adore those frames!!!
Thanks so much!
Wow! What a great way to alter frames! those are so pretty!
I was doing so good until this video. Have the frames (of course)-but now have bookmarked Pretty Little Studio so I can buy all those cute goodies! These made me happy looking at them-being happy is a good thing-crafty rationalization at it’s best. You are just too talented!
Cute! Love the little pretty fox!
These are gorgeous! What a fabulous idea!
These are gorgeous! What a fabulous idea!
Adorable frames! I love the butterflies, ribbon and fox. Thanks for sharing.
great projects – amazing bow on both. Love the cluster of embellies on your album
Your frames are darling!
Great idea.
Carla from Utah
Your altered frames are wonderful and how brilliant to put magnets on them so they can be moved around from place to place so easily!!
Dollar spot items? I use them on almost every project I make!!! lol…
Thanks for sharing your amazing projects!!
<3 J
jwoolbright at gmail dot com
HerPeacefulGarden.blogspot.com
ok, these are adorable!
Love the idea of the frames. I have some small ones but had no idea what to do with them – don’t have photos to put in them. this will be great and they can be changed when you get tired of the current look.
The card is very nice.
thanks for sharing.
That a fab idea to decorate the mini frames like that… so cute! Your album is gorgeous… I’ve got a crush on those lovely papers!!
I love those little frames! So cute! And I totally agree with the reasoning behind the idea! I love seeing my work displayed out where I can see it!
I love the altered frames. What cute gift ideas!
I have found rubber stamps and embellishments in the dollar bins! I love to find those bargains.
EEK! Jennifer, these are adorable! That bow? It is absolutely DIVINE!! Love your new site too.. Hugs!
Thanks so much!
The frames are adorable. Very clever way to use those cute diecuts
love these frames, great job! and thanks so much for posting my party logo, really appreciate it, and thanks for sharing !
Loving the oversized bow! Cute idea. Visiting from Show + Tell party.
The little frames are so sweet. I love the colors! I store seasonal things in apple boxes. Hubby built me shelves in the basement and it works great. Must admit I have it filled to the brim. 🙂 Thanks for sharing with SYC.
hugs,
Jann
These are so pretty! Thank you for linking up to TOO Cute Tuesday! Pinned it!